canon 5d mark ii user manual
The Canon EOS 5D Mark II is a legendary full-frame DSLR camera, featuring a 21.1-megapixel CMOS sensor, DIGIC 4 processor, and advanced shooting capabilities. Renowned for its exceptional image quality, versatility, and durability, this camera remains a favorite among professionals and enthusiasts. With its comprehensive user manual, photographers can unlock its full potential, exploring features like Full HD video recording, customizable shooting modes, and precise autofocus systems. This guide provides a detailed overview to help users master the EOS 5D Mark II’s capabilities and enhance their photography experience.
Overview of the Camera and Its Features
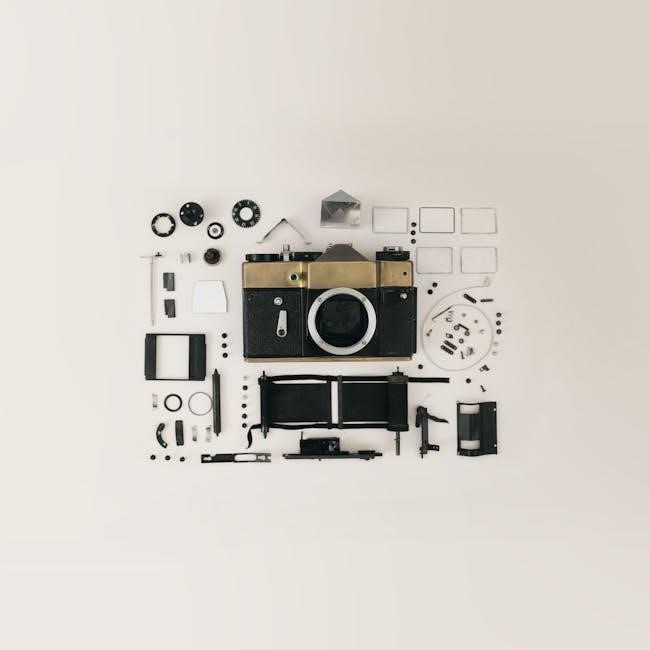
The Canon EOS 5D Mark II is a high-performance DSLR camera featuring a 21.1-megapixel full-frame CMOS sensor, DIGIC 4 image processor, and 9-point autofocus system. It supports continuous shooting at 3.9 fps, Live View functionality, and Full HD video recording. The camera offers a wide range of shooting modes, including Auto, Aperture Priority, Shutter Priority, Manual, and customizable C1, C2, and C3 settings. With advanced metering modes, customizable functions, and compatibility with various lenses and accessories, the 5D Mark II delivers exceptional versatility for both still photography and video capture, catering to professionals and enthusiasts alike.
Importance of the User Manual for Optimal Use
The Canon EOS 5D Mark II user manual is essential for unlocking the camera’s full potential. It provides a comprehensive guide to understanding and utilizing the camera’s advanced features, such as shooting modes, autofocus settings, and video capabilities. The manual includes detailed instructions for customizing settings, troubleshooting common issues, and optimizing image quality. Whether you’re a professional or an enthusiast, the manual serves as a valuable resource to enhance your photography skills and ensure you get the most out of your camera. It is a must-have for mastering the 5D Mark II’s capabilities.
Installation and Setup
Download the Canon EOS 5D Mark II user manual (PDF) for firmware updates (Version 2.0.0 or later) and follow setup instructions for optimal camera configuration and operation.
Downloading the Canon EOS 5D Mark II User Manual
The Canon EOS 5D Mark II user manual is available as a PDF file, providing detailed instructions for camera operation. To download, visit the Canon website, navigate to the support section, and search for the EOS 5D Mark II. Select the appropriate firmware version (2.0.0 or later) and follow the download prompts. The manual covers essential features, shooting modes, and customization options, ensuring optimal use of the camera. It is recommended to save the PDF for easy access and reference during photography sessions.
Installing Firmware Updates (Version 2.0.0 or Later)
Updating the Canon EOS 5D Mark II firmware to version 2.0.0 or later is essential for unlocking advanced features, such as manual video controls. Visit the Canon website, navigate to the support section, and select your camera model. Download the latest firmware file and follow the on-screen instructions to install it. Ensure the camera is fully charged and connected to a computer via USB for a smooth update process. This enhances performance and adds functionality, ensuring optimal camera operation and access to all available features.
Initial Camera Setup and Configuration
Begin by setting up your Canon EOS 5D Mark II with basic configurations; Start with language, date, and time settings. Insert a memory card and format it in the camera for optimal performance. Set the shooting mode to Auto or Manual, depending on your preference. Adjust the autofocus and metering modes to suit your needs. Familiarize yourself with the external controls and button layout. Refer to the user manual for detailed instructions on customizing settings like white balance, ISO, and picture styles. Proper setup ensures a smooth and personalized shooting experience.

Camera Design and Layout
The Canon EOS 5D Mark II features a durable magnesium alloy body with weather sealing, a 3.0-inch LCD screen, and intuitive button placement for easy access to controls.
External Controls and Button Layout
The Canon EOS 5D Mark II features a robust magnesium alloy body with weather sealing, ensuring durability in various conditions. The camera’s external controls are thoughtfully designed for intuitive operation. The Mode Dial on the top-left allows quick access to shooting modes, while the Main Dial and Quick Control Dial enable precise adjustments. Key buttons like ISO, AF-ON, and the multi-controller provide easy navigation. The 3.0-inch LCD screen on the back offers a clear view of settings and images. This ergonomic layout enhances usability, allowing photographers to focus on capturing moments seamlessly.
Understanding the Mode Dial and Shooting Modes
The Canon EOS 5D Mark II’s Mode Dial offers a range of shooting modes to suit various photography needs. Auto mode simplifies operation for beginners, while P (Program AE) allows automatic settings with user adjustments. Aperture Priority (Av) and Shutter Priority (Tv) modes enable control over aperture and shutter speed, respectively. Manual (M) mode provides full creative control. Custom modes (C1, C2, C3) store personalized settings for quick access. The dial also includes options for Bulb (B) and Flash Off modes, catering to specific shooting scenarios. This versatility ensures photographers can adapt to any situation effortlessly.
Navigating the LCD Screen and Menus

The Canon EOS 5D Mark II features a 3.0-inch LCD screen for reviewing images and accessing menus. The Quick Control Dial and Multi-controller enable easy navigation through menu options. The menu system is divided into tabs: Shooting, Playback, Setup, Custom Functions, and My Menu. Each tab provides access to specific settings, such as image quality, white balance, and autofocus options. Users can customize the interface by registering frequently used settings in the My Menu tab. The LCD screen also supports Live View for precise composition and focus adjustments, enhancing overall shooting efficiency and control.
Shooting Modes
The Canon EOS 5D Mark II offers various shooting modes, including Auto, Aperture Priority, Shutter Priority, Manual, and Custom modes, providing flexibility for diverse photography needs and styles.
Auto Mode for Beginners
Auto Mode is the perfect starting point for new users of the Canon EOS 5D Mark II. This mode simplifies photography by automatically adjusting settings like aperture, shutter speed, and ISO for optimal results. It’s ideal for casual snapshots, family events, or travel photography, where quick and hassle-free shooting is prioritized. The camera assesses the scene and selects the most appropriate settings, ensuring well-exposed images with minimal effort. This mode allows beginners to focus on composition and creativity while the camera handles the technical details. The user manual provides clear guidance on activating and using Auto Mode effectively.
Aperture Priority (Av) and Shutter Priority (Tv) Modes
Aperture Priority (Av) and Shutter Priority (Tv) modes offer partial manual control, ideal for creative photography. In Av mode, you set the aperture, and the camera adjusts the shutter speed for proper exposure, allowing control over depth of field. Tv mode lets you set the shutter speed to freeze or blur motion, with the camera adjusting the aperture. These modes are perfect for photographers who want to balance creativity with automation, enabling precise control over specific aspects of their shots while the camera handles the rest. The user manual provides detailed guidance on using these modes effectively.
Manual (M) Mode for Full Control
Manual (M) mode grants full creative control, allowing photographers to independently adjust aperture, shutter speed, and ISO. This mode is ideal for experienced users who want precise control over exposure settings. The Canon EOS 5D Mark II’s manual mode enables fine-tuning of every aspect of the shot, ensuring optimal results in challenging lighting conditions; The user manual provides detailed instructions on how to use M mode effectively, including setting the desired aperture, shutter speed, and ISO for complete command over the camera’s functionality and artistic expression.
Custom Shooting Modes (C1, C2, C3)
The Canon EOS 5D Mark II offers three custom shooting modes (C1, C2, C3) that allow users to save and quickly access their preferred settings. These modes are ideal for photographers who frequently shoot in specific conditions or styles. By registering settings like aperture, shutter speed, and ISO, users can recall them with ease, streamlining their workflow. The user manual provides detailed instructions on how to set up and use these modes, enabling photographers to tailor the camera to their creative needs and shooting scenarios efficiently. This feature enhances customization and accessibility, making it a powerful tool for professionals and enthusiasts alike.
Menu Functions
The Canon EOS 5D Mark II features a comprehensive menu system, including Shooting, Playback, Setup, Custom Functions, and My Menu options, allowing precise camera customization and control.
Shooting Menu: Settings for Image Capture
The Shooting Menu on the Canon EOS 5D Mark II provides essential settings for capturing images. Options include Image Quality (JPEG, RAW, or both), White Balance, Picture Style, and Autofocus mode. Users can also adjust ISO sensitivity, Auto Lighting Optimizer, and Noise Reduction. Additionally, the menu allows customization of metering modes (Evaluative, Center-Weighted, Spot) and flash settings. These features enable precise control over image capture, ensuring optimal results in various shooting conditions. Properly configuring these settings is crucial for achieving desired photographic outcomes.
Playback Menu: Managing and Reviewing Images
The Playback Menu on the Canon EOS 5D Mark II allows users to review and manage captured images. Key features include image playback, deletion, and protection. Users can also rotate images, set slide shows, and display histogram data for exposure analysis. Additionally, the menu offers options to jump through images by date or folder and select a startup image for the camera. These tools enhance post-capture organization and review, making it easier to manage and share photos efficiently. Proper use of these settings ensures a streamlined workflow for photographers.
Setup Menu: Customizing Camera Settings
The Setup Menu on the Canon EOS 5D Mark II enables users to customize camera settings for personalized use. Key options include setting the date, time, and language, as well as formatting memory cards and adjusting LCD brightness. Users can also configure auto power-off timing, file numbering, and sensor cleaning. These settings allow photographers to tailor the camera to their preferences, ensuring a more efficient and enjoyable shooting experience. Proper customization enhances workflow and ensures optimal camera performance for various photography scenarios.
Custom Functions Menu: Advanced Customization
The Custom Functions Menu on the Canon EOS 5D Mark II offers advanced customization options to tailor the camera to individual preferences. Users can assign functions to buttons, adjust autofocus behavior, and customize shooting parameters like ISO increments and exposure compensation. These settings allow for personalized control, enhancing shooting efficiency and comfort. By fine-tuning these options, photographers can optimize the camera’s performance for their specific needs, ensuring a more intuitive and effective workflow during photo sessions.
My Menu: Personalizing Frequently Used Settings
The Canon EOS 5D Mark II’s My Menu feature allows users to personalize their frequently used settings, streamlining workflow and enhancing efficiency. By registering up to six custom settings, photographers can quickly access their most-used options without navigating through multiple menus. This customization ensures that the camera adapts to individual preferences, making it easier to focus on capturing moments. My Menu is a practical tool for optimizing camera operation, saving time, and improving overall shooting efficiency.

Image Quality and Customization
The Canon EOS 5D Mark II delivers exceptional image quality with its 21.1 MP CMOS sensor and DIGIC 4 processor. Users can customize settings like Picture Styles, White Balance, and compression to tailor results for specific shooting scenarios, ensuring optimal output and creative control.
Understanding Resolution and Compression Settings
The Canon EOS 5D Mark II offers a maximum resolution of 5616 x 3744 pixels, ensuring detailed and high-quality images. Users can choose from various resolution settings (Large, Medium, Small) to balance file size and quality. Compression options, including Fine, Normal, and RAW formats, allow customization based on shooting needs. Fine compression minimizes file size while maintaining quality, while RAW captures uncompressed data for maximum post-processing flexibility. Understanding these settings helps optimize storage and achieve desired image results, making it essential for photographers to adjust based on their creative goals and workflow requirements.
White Balance and Color Space Options
The Canon EOS 5D Mark II offers precise white balance settings, including Auto, Daylight, Shade, Tungsten, Fluorescent, and Custom options, ensuring accurate color reproduction in various lighting conditions. Additionally, the camera supports two color spaces: sRGB for standard use and Adobe RGB for wider color gamut, ideal for professional workflows. These features allow photographers to capture images with consistent and vibrant colors, whether shooting in natural light or controlled environments, enhancing the overall quality and versatility of their work.

Picture Styles for Different Shooting Scenarios
The Canon EOS 5D Mark II offers multiple Picture Styles to enhance your photography, including Standard, Portrait, Landscape, Neutral, and Faithful. These styles adjust sharpness, contrast, and color tone to suit various subjects and lighting conditions. Additionally, the Monochrome style enables stunning black-and-white photography. Users can also create and register custom Picture Styles to match their creative vision. This feature allows for tailored image processing, ensuring optimal results for portraits, landscapes, or artistic expressions, all while maintaining the camera’s renowned image quality and versatility.

Focusing and Metering
The Canon EOS 5D Mark II features a 9-point AF system with 6 additional assist points for precise focus control. Metering modes include Evaluative, Center-Weighted, and Spot options, ensuring accurate exposure in various lighting conditions.
Autofocus Modes: One-Shot, AI Servo, and Manual Focus
The Canon EOS 5D Mark II offers three primary autofocus modes: One-Shot AF, AI Servo AF, and Manual Focus. One-Shot AF is ideal for stationary subjects, locking focus once the shutter button is pressed halfway. AI Servo AF is designed for moving subjects, continuously adjusting focus to track motion. Manual Focus allows precise control, enabling users to adjust focus manually using the lens ring. The camera also supports AF point selection and expansion, enhancing flexibility in various shooting scenarios. These modes ensure accurate and adaptable focusing for diverse photography needs.
AF Point Selection and Expansion
The Canon EOS 5D Mark II features a 9-point AF system with six additional Assist AF points, providing precise focus acquisition. Users can manually select AF points using the Multi-controller, allowing for greater control over focus placement. AF point expansion is also available, enabling the camera to use adjacent points for improved accuracy when tracking moving subjects. This feature is particularly useful in dynamic shooting situations, ensuring sharp focus even when subjects are in motion. The system is compatible with firmware version 2.0.0 or later, enhancing overall autofocus performance and reliability.
Metering Modes: Evaluative, Center-Weighted, and Spot
The Canon EOS 5D Mark II offers three metering modes to cater to various lighting conditions. Evaluative metering analyzes the entire scene, providing balanced exposure. Center-Weighted metering prioritizes the central area, ideal for portraits. Spot metering measures a small, selectable area, perfect for high-contrast scenes. These modes ensure precise exposure control, allowing photographers to adapt to different shooting scenarios effectively. Firmware version 2.0.0 or later enhances metering accuracy, providing reliable results across diverse lighting environments.

Video Shooting
The Canon EOS 5D Mark II supports Full HD video recording with manual controls, enabled through firmware updates. It offers ISO, aperture, and shutter speed adjustments, ensuring creative flexibility. Live View mode facilitates video capture, while audio options include a wind filter for clearer sound. These features make it a versatile tool for videographers, delivering high-quality footage with precise control.
Full HD Video Capture and Frame Rates
The Canon EOS 5D Mark II captures stunning Full HD video at 1920×1080 pixels, with frame rates of 30, 25, or 24 fps. This feature, combined with its 21.1-megapixel sensor, delivers high-quality footage. The camera supports manual controls for video, including ISO, aperture, and shutter speed adjustments, providing creative flexibility. Firmware updates, such as Version 2.0.0, enhanced video capabilities, making it a favorite among videographers. These settings ensure precise control over video production, allowing users to achieve professional-grade results with ease and versatility.
Manual Controls for Video (Firmware Update)
A firmware update for the Canon EOS 5D Mark II introduced manual controls for video, enabling adjustments to ISO, aperture, and shutter speed during recording. This update, available for firmware Version 2.0.0 or later, significantly enhanced creative control for videographers. Users can now fine-tune exposure settings to achieve desired visual effects, ensuring greater flexibility and precision in video production. These manual controls, combined with Full HD capabilities, make the camera a powerful tool for professional-grade video capture, addressing earlier limitations and expanding its versatility for filmmakers and content creators.
Using Live View for Video Recording
Live View on the Canon EOS 5D Mark II enables real-time preview of video recording on the LCD screen, allowing precise framing and focus adjustments. Activating Live View is done via a dedicated button, providing an intuitive way to monitor scenes. This feature is particularly useful for ensuring sharp focus and accurate composition during video capture. The user manual details how to enable and utilize Live View effectively, making it an essential tool for achieving high-quality video results with the EOS 5D Mark II.
Audio Recording and Wind Filter Options
The Canon EOS 5D Mark II offers enhanced audio recording capabilities, allowing users to capture high-quality sound during video shooting. The camera supports manual audio level adjustment, enabling precise control over sound recording. Additionally, the wind filter option helps reduce unwanted noise caused by wind, ensuring clearer audio in outdoor environments. These features, detailed in the user manual, provide filmmakers and videographers with tools to improve audio quality, making the EOS 5D Mark II a versatile choice for professional-grade video production.
Memory and Storage
The Canon EOS 5D Mark II supports high-capacity memory cards, ensuring ample storage for images and videos. Compatible with CF cards, it offers flexible storage solutions for efficient data management and backup options, while formatting options maintain optimal performance and organization of captured content.
Compatible Memory Cards and Storage Solutions
The Canon EOS 5D Mark II supports CompactFlash (CF) memory cards, ensuring compatibility with high-capacity storage solutions. Using CF cards offers reliable performance for storing high-resolution images and video. For optimal use, it is recommended to use cards with a minimum write speed of 20MB/s to handle continuous shooting and video recording efficiently. Regular formatting of memory cards via the camera’s menu helps maintain performance and prevents data corruption. Always use high-quality cards from trusted manufacturers to ensure durability and reliability during photo shoots.
Formatting Memory Cards and Data Management
Formatting memory cards through the Canon EOS 5D Mark II’s setup menu ensures optimal performance and prevents data corruption. Regular formatting is recommended to maintain card reliability. When formatting, all data on the card is erased, so always back up important files beforehand. Use high-quality memory cards and avoid using cards formatted by other devices. After downloading images to your computer, organize files into folders for easy access. This practice helps in managing your photo library efficiently and prevents data loss. Proper data management is crucial for a smooth photography workflow.

Troubleshooting and Maintenance
Identify common issues like error messages or sensor dust. Regularly clean the sensor and update firmware for optimal performance. Check for card errors and ensure proper camera maintenance.
Common Issues and Solutions
Common issues with the Canon EOS 5D Mark II include error messages, sensor dust, and firmware compatibility. For error messages, restart the camera or reformat the memory card. Sensor dust can be removed using manual cleaning tools or by sending the camera to a Canon service center. Ensure firmware is updated to the latest version (2.0.0 or later) for optimal performance. Regularly check for card errors and format cards in-camera to prevent data loss. Proper maintenance ensures reliable operation and image quality.
Cleaning the Sensor and Camera Maintenance
Regular sensor cleaning is essential to maintain image quality. Turn off the camera, use a fully charged battery, and activate Mirror Lockup. Use a soft brush or blower to remove dust. For stubborn spots, dampen a swab with cleaning solution and gently wipe the sensor. Avoid touching the sensor surface. If manual cleaning fails, contact a Canon service center. Proper maintenance also includes cleaning the exterior with a soft cloth and avoiding extreme temperatures. Regular checks ensure optimal performance and prevent dust-related image quality issues.
Updating Firmware for Enhanced Features
Updating the Canon EOS 5D Mark II’s firmware is crucial for accessing new features and improving performance. Firmware version 2.0.0 or later enables manual video controls, allowing adjustments to ISO, aperture, and shutter speed during recording. To update, download the latest firmware from Canon’s official website, ensure the camera is fully charged, and follow the on-screen instructions. Regular firmware updates ensure compatibility with the latest accessories and optimize camera functionality, providing a better user experience and enhanced creative control for photographers and videographers alike.

Accessories and Enhancements
Enhance your Canon EOS 5D Mark II experience with recommended lenses, external flash units, and wireless connectivity options, expanding its functionality and creative possibilities for photographers.
Recommended Lenses and Accessories
The Canon EOS 5D Mark II supports a wide range of EF-mount lenses, including the EF 24-70mm f/2.8L II USM and EF 70-200mm f/2.8L IS III USM for exceptional image quality. Additional accessories like external flash units, such as the Speedlite 600EX II-RT, enhance lighting control. Battery grips, like the BG-E6, extend shooting capacity, while remote shutter releases (e.g., RS-80N3) minimize camera shake. Wireless transmitters, such as the WFT-E4 II, enable advanced connectivity for professional workflows, ensuring optimal performance and versatility for photographers.

Using External Flash and Speedlites
The Canon EOS 5D Mark II supports external flash units, such as the Speedlite 600EX II-RT, for enhanced lighting control. These Speedlites offer wireless functionality, high-speed sync, and advanced creative options. They can be mounted on the camera’s hot shoe or used off-camera for dynamic lighting effects. External flashes are ideal for reducing shadows, adding depth, and achieving professional-grade illumination in various shooting scenarios. Properly configuring the Speedlite with the camera ensures seamless operation and optimal results, making it an essential accessory for photographers seeking precise lighting control.
Remote Shutter Release and Wireless Connectivity
The Canon EOS 5D Mark II supports remote shutter release via infrared remote controllers or wired releases, minimizing camera shake during shooting. Wireless connectivity options, such as the WFT-E4 II transmitter, enable photographers to transfer images wirelessly and control the camera remotely. This feature is ideal for studio setups or capturing images in challenging environments. Additionally, the camera can be connected to external devices for live view monitoring, enhancing workflow efficiency and creative control during photo sessions.
The Canon EOS 5D Mark II remains a legendary camera, offering exceptional image quality and versatility. For further mastery, explore Canon’s official manuals, firmware updates, and online tutorials to unlock its full potential and enhance your photography skills.
Final Tips for Mastering the Canon EOS 5D Mark II
Mastering the Canon EOS 5D Mark II requires practice and exploration of its advanced features. Regularly review the user manual to uncover hidden capabilities and optimize your workflow. Keep the firmware updated to ensure the latest enhancements and improvements. Experiment with custom shooting modes (C1, C2, C3) to tailor settings for specific scenarios. Practice using manual focus, metering modes, and white balance for precise control. Utilize external resources like tutorials and Canon’s official support for deeper insights. By combining hands-on experience with thorough knowledge, you’ll unlock the full potential of this iconic camera.
Recommended Reading and Online Resources
For comprehensive understanding, visit Canon’s official website for the EOS 5D Mark II user manual and firmware updates. Explore Canon’s support page for drivers, firmware, and troubleshooting guides. The Canon EOS 5D Mark II Digital Field Guide and Pocket Guide offer in-depth tips and quick references. Online forums and video tutorials provide community insights and practical demonstrations. Download the PDF manual from trusted sources like Canon’s official portal or authorized retailers. Additionally, apps like Handi 5Dmk2 offer mobile-friendly guides. Utilize these resources to enhance your mastery of the camera’s features and capabilities.