2022 subaru forester maintenance schedule pdf
The 2022 Subaru Forester maintenance schedule is essential for ensuring reliability, performance, and longevity․ Regular upkeep helps prevent issues and keeps your vehicle in optimal condition․
Why Regular Maintenance is Crucial for the Subaru Forester
Regular maintenance is vital for the Subaru Forester to ensure optimal performance, reliability, and longevity․ It helps prevent mechanical issues, enhances safety, and maintains the vehicle’s value․ By following the recommended schedule, owners can identify potential problems early, reducing the risk of costly repairs․ Proper upkeep also ensures that critical systems, such as the engine, transmission, and brakes, function as intended․ Additionally, regular maintenance supports fuel efficiency and overall driving comfort․ Neglecting routine checks can lead to premature wear and tear, compromising the vehicle’s reliability․ Staying on top of maintenance is an investment in the Forester’s long-term health and your peace of mind on the road․
Overview of the 2022 Subaru Forester Model
The 2022 Subaru Forester is a versatile and reliable compact SUV designed for both urban and off-road adventures․ It features a spacious interior, ample cargo space, and advanced safety technologies like EyeSight Driver Assist Technology․ With a robust 2․5-liter Subaru Boxer engine, the Forester delivers excellent fuel efficiency and smooth performance․ Its Symmetrical All-Wheel Drive system ensures superior traction and control on various terrains․ The model also boasts a user-friendly infotainment system, comfortable seating, and a reputation for durability․ Whether for daily commutes or outdoor escapades, the Forester is a practical choice․ Its design emphasizes functionality, safety, and comfort, making it a popular option among SUV enthusiasts․
Understanding the 2022 Subaru Forester Maintenance Schedule PDF
The PDF provides a detailed guide for maintaining your Forester, including regular service intervals, diagnostic tools, and guidelines to ensure optimal performance and longevity of your vehicle․
Key Components of the Maintenance Schedule
The 2022 Subaru Forester maintenance schedule outlines essential services to ensure the vehicle runs smoothly․ Key components include oil changes every 6,000 to 7,500 miles, tire rotations every 5,000 miles, and regular inspections of brakes, belts, and hoses․ Fluid checks, including engine oil, transmission, and coolant, are also crucial․ The schedule emphasizes filter replacements, such as the air filter every 15,000 miles and the cabin air filter every 12,000 miles․ Battery health checks and wiper blade replacements are recommended annually or as needed․ Proper maintenance intervals ensure the Forester’s all-wheel-drive system and Boxer engine perform optimally․ Adhering to these guidelines helps prevent costly repairs and maintains warranty compliance․

How to Access the Official Maintenance Schedule PDF
To access the official 2022 Subaru Forester maintenance schedule PDF, visit Subaru’s website and navigate to the “Owners” or “Support” section․ Create an account or log in to access exclusive resources․ The PDF is also available in the owner’s manual provided with the vehicle․ Additionally, authorized Subaru dealerships can provide a digital or printed copy upon request․ Ensure the document is downloaded from trusted sources to avoid misinformation․ This guide is essential for understanding service intervals, ensuring your Forester remains reliable and performs optimally․ Regularly refer to the PDF to stay informed about recommended maintenance procedures and schedules․

Interpreting the Recommended Maintenance Intervals
The 2022 Subaru Forester maintenance schedule PDF outlines service intervals based on mileage and time․ Routine tasks like oil changes are every 6,000 to 7,500 miles, while tire rotations occur every 7,500 miles․ Brake inspections and fluid checks are recommended at specific intervals to ensure safety and performance․ The PDF provides a detailed timeline, making it easy to track when services are due․ Understanding these intervals helps prevent overdue maintenance, which can lead to costly repairs․ By following the schedule, owners can maintain their vehicle’s health and ensure it runs efficiently for years․ Regular maintenance also supports warranty compliance and enhances overall driving experience․
Importance of Adhering to the Maintenance Schedule

Regular maintenance ensures optimal performance, extends vehicle longevity, and prevents costly repairs․ It enhances safety, retains warranty validity, and maintains the Subaru Forester’s reliability and efficiency․
Ensuring Vehicle Reliability and Performance
Regular maintenance is crucial for maintaining the reliability and performance of your 2022 Subaru Forester․ By following the recommended schedule, you ensure that critical systems, such as the engine, transmission, and braking system, function optimally․ Oil changes, tire rotations, and filter replacements are essential for preventing mechanical issues and enhancing overall driving performance․ Additionally, routine inspections help identify potential problems early, reducing the risk of breakdowns․ Proper maintenance also preserves the vehicle’s all-wheel-drive system, a hallmark of Subaru’s design, ensuring it operates efficiently in various driving conditions․ A well-maintained Forester delivers a smoother, safer, and more enjoyable driving experience․
- Oil changes maintain engine health․
- Tire rotations ensure even wear and better traction․
- Regular inspections prevent unexpected repairs․
Preventing Costly Repairs Through Regular Maintenance
Regular maintenance plays a vital role in preventing costly repairs for your 2022 Subaru Forester․ By adhering to the recommended schedule, you can identify and address minor issues before they escalate into major problems․ For instance, routine oil changes prevent engine damage, while brake inspections ensure safety and avoid expensive replacements․ Timely tire rotations and balancing reduce uneven wear, extending the life of your tires․ Additionally, regular fluid checks and filter replacements help maintain optimal performance and prevent premature system failures․ Addressing issues early can save hundreds or even thousands of dollars in repair costs down the road․
- Oil changes prevent engine damage․
- Brake inspections ensure safety and avoid costly repairs․
- Tire rotations extend tire life and improve safety․
Maintaining Warranty Compliance
Maintaining Warranty Compliance
Adhering to the 2022 Subaru Forester maintenance schedule ensures warranty compliance, protecting your investment․ Subaru’s warranty requires regular maintenance as outlined in the schedule․ Failure to follow these guidelines can result in denied claims for repairs․ Keep detailed records of all maintenance performed, including oil changes, tire rotations, and inspections․ This documentation serves as proof of compliance․ Subaru’s warranty covers parts and labor for defects, but only if proper maintenance is upheld․ Neglecting scheduled services can void the warranty, leaving you liable for repair costs․ Always refer to the official maintenance schedule PDF for specific requirements and timelines to avoid financial risks․
- Regular maintenance is mandatory for warranty coverage․
- Keep records of all services performed․
- Non-compliance can result in denied warranty claims․
Recommended Maintenance Intervals for the 2022 Subaru Forester
The 2022 Subaru Forester requires regular maintenance every 3,750 to 7,500 miles, depending on driving conditions․ Synthetic oil is recommended for optimal performance and longevity․ Schedule annual checks for fluids, belts, and tires․ Adjust intervals for extreme temperatures or towing․ Always consult the maintenance schedule PDF for precise timelines and procedures to ensure reliability and warranty compliance․
- Every 3,750–7,500 miles: Oil and filter change․
- Every 15,000 miles: Tire rotation and brake inspection․
- Annual: Battery, coolant, and wiper checks․
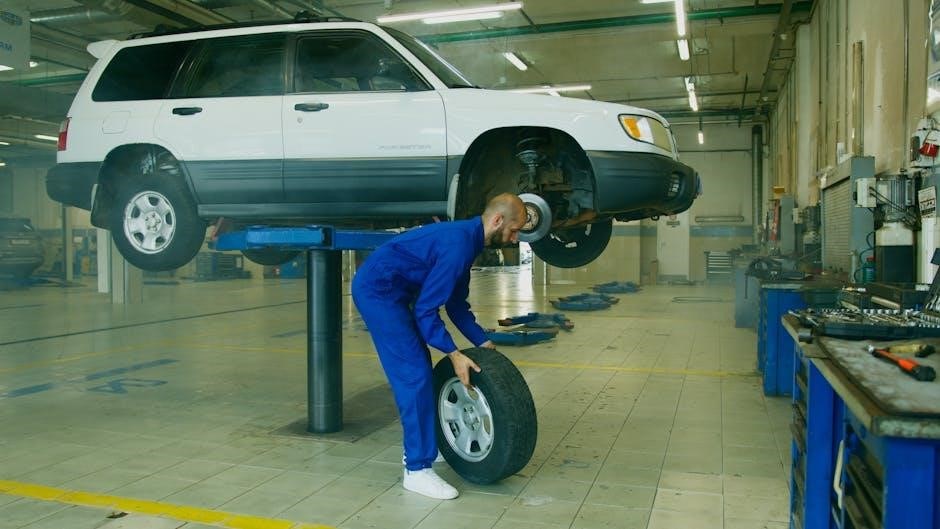
Oil Change Intervals and Requirements
The 2022 Subaru Forester requires oil changes at specific intervals to maintain optimal engine performance․ Under normal driving conditions, oil changes are recommended every 6,000 miles․ However, for vehicles subjected to severe driving conditions—such as frequent stop-and-go traffic, extreme temperatures, or towing—oil changes should occur every 3,750 miles․ Subaru specifies the use of synthetic oil, which provides better lubrication and protection for the engine․ The recommended oil viscosity is 0W-20․ Always use a high-quality oil filter, preferably a genuine Subaru filter, to ensure proper filtration․ Neglecting regular oil changes can lead to premature engine wear and potential damage․ Refer to the maintenance schedule PDF for detailed guidelines and specifications tailored to your driving habits․
- Normal conditions: Every 6,000 miles․
- Severe conditions: Every 3,750 miles․
- Recommended oil: 0W-20 synthetic․
- Filter replacement: Genuine Subaru oil filter․
Tire Rotation and Pressure Specifications
Proper tire maintenance is essential for the 2022 Subaru Forester․ Tire rotation should be performed every 5,000 to 8,000 miles to ensure even tread wear and extend tire life․ The recommended rotation pattern is described in the maintenance schedule PDF․ Tire pressure should be checked monthly and before long trips, using the specifications listed on the tire information placard or in the owner’s manual․ The recommended pressure is typically around 33-36 PSI for most trims, depending on load and driving conditions․ Incorrect pressure can lead to reduced fuel efficiency, uneven wear, or safety risks․ Always use a reliable pressure gauge for accurate readings and adjust pressure when tires are cold for optimal accuracy․
- Rotate tires every 5,000–8,000 miles․
- Check tire pressure monthly and before trips․
- Use the tire information placard for specifications․
Brake System Maintenance and Inspections
Regular brake system maintenance is crucial for the safety and performance of the 2022 Subaru Forester․ The maintenance schedule recommends inspecting brake pads every 12,000 miles and rotors every 15,000 miles․ Brake fluid should be replaced every 30,000 miles to ensure optimal braking performance․ Additionally, the parking brake should be inspected annually or if issues arise․ Any signs of wear, such as squealing or vibrations, should be addressed promptly․ Proper maintenance helps prevent costly repairs and ensures reliable stopping power․ Always refer to the official PDF for detailed guidelines and procedures to maintain your Subaru Forester’s brake system in top condition․
- Inspect brake pads every 12,000 miles․
- Check rotors every 15,000 miles․
- Replace brake fluid every 30,000 miles․
- Inspect parking brake annually․

Additional Maintenance Tips for the Subaru Forester
Regular checks of fluids, belts, and hoses ensure optimal performance․ Monitor tire tread depth and alignment․ Clean sensors and ensure proper battery connections for reliability․
- Inspect wiper blades and replace as needed․
- Clean air intakes to improve fuel efficiency․
- Check suspension components for wear․
Filter Replacements (Air, Cabin, and Oil)
Regular filter replacements are essential for maintaining the 2022 Subaru Forester’s performance and efficiency․ The oil filter should be replaced every 5,000 to 7,500 miles to ensure clean engine oil circulation․ The engine air filter, typically replaced every 15,000 to 30,000 miles, improves fuel efficiency and reduces emissions․ The cabin air filter, which cleans the air inside the vehicle, should be replaced every 12,000 to 18,000 miles to maintain interior comfort and air quality․ Neglecting these replacements can lead to reduced engine performance, decreased fuel efficiency, and compromised interior comfort․ Always consult the maintenance schedule PDF for specific recommendations tailored to your driving conditions․
- Oil filter: Every 5,000–7,500 miles․
- Engine air filter: Every 15,000–30,000 miles․
- Cabin air filter: Every 12,000–18,000 miles․
Battery Maintenance and Health Checks
Regular battery maintenance is vital for the reliable operation of your 2022 Subaru Forester․ The battery should be inspected every 6 months or as recommended in the maintenance schedule PDF․ Check the terminals for corrosion and ensure they are securely connected․ Look for signs of wear, such as swelling, cracks, or dimming of the dashboard lights, which may indicate a failing battery․ Extreme temperatures can affect battery performance, so additional checks are recommended in hot or cold climates․ Testing the battery’s charge and ensuring proper charging methods are crucial to extend its lifespan․ Neglecting battery health can lead to unexpected failures, so proactive maintenance is essential for consistent performance and reliability․
Cooling System and Hose Inspections
Regular inspections of the cooling system and hoses are essential to prevent overheating and ensure optimal engine performance in your 2022 Subaru Forester․ The maintenance schedule PDF recommends checking coolant levels every 3,000 to 7,500 miles and inspecting hoses for cracks, leaks, or signs of wear․ Additionally, ensure the coolant mixture is correct to avoid corrosion and maintain proper temperature regulation․ Hoses should be examined for soft spots or brittleness, especially near connection points․ Replacing worn or damaged hoses early can prevent costly repairs and potential engine damage․ Neglecting these checks may lead to overheating issues, which can cause severe harm to the engine․ Always refer to the schedule for specific intervals and guidelines to keep your Forester running smoothly․
Exterior and Interior Maintenance
Regular exterior waxing protects the paint, while interior cleaning maintains upholstery quality․ Vacuum and clean surfaces regularly, using gentle products to prevent damage and extend longevity․
Waxing and Paint Protection
Regular waxing is essential to protect the 2022 Subaru Forester’s exterior paint from environmental damage․ Use a high-quality car wax every 3-4 months to maintain the finish․ Avoid using harsh chemicals or abrasive cleaners, as they can harm the paint․ For added protection, consider applying a ceramic coating, which provides a durable barrier against UV rays and contaminants․ Always wash the vehicle regularly to remove dirt and debris that can scratch the paint over time․ Avoid automated car washes with brushes, as they may damage the exterior․ Inspect the vehicle for minor scratches or damage and touch them up promptly to prevent rust or further deterioration․
Interior Cleaning and Upholstery Care
Regular interior cleaning is vital to maintain the comfort and appearance of your 2022 Subaru Forester․ Vacuum all surfaces, including seats, carpets, and crevices, to remove dirt and debris․ Use a soft-bristle brush attachment to avoid damaging upholstery․ For stains or spills, clean immediately with a mild detergent and water․ Avoid harsh chemicals or abrasive cleaners, as they can harm materials․ For leather upholstery, use a leather conditioner to maintain suppleness and prevent cracking․ Clean dashboard and trim with a microfiber cloth and gentle cleaner․ Avoid placing items in direct sunlight to prevent fading or warping․ Regularly sanitize high-touch areas like the steering wheel and controls․ Use fabric protectants to repel stains and spills on cloth upholstery․ A clean interior not only enhances comfort but also preserves the vehicle’s value․

Diagnostic Checks and Troubleshooting
Regular diagnostic checks help identify potential issues early using Subaru-specific tools like the Select Monitor․ Reference the PDF for detailed troubleshooting guides to ensure accurate repairs․
Using the Maintenance Schedule PDF for Diagnostic Guidance
The 2022 Subaru Forester Maintenance Schedule PDF provides detailed diagnostic guidance to help owners identify and address potential issues․ It outlines specific procedures for checking various systems, such as the engine, transmission, and brakes․ The PDF includes charts and diagrams that highlight common warning signs and symptoms, enabling drivers to pinpoint problems early․ Additionally, it offers step-by-step troubleshooting tips, reducing the need for immediate professional assistance․ By referencing the PDF, owners can perform basic diagnostics, ensuring timely repairs and preventing minor issues from escalating․ This resource is essential for maintaining the vehicle’s health and optimizing its performance over time․ Regular use of the guide helps extend the lifespan of the Subaru Forester․
Identifying Common Issues Early
The 2022 Subaru Forester Maintenance Schedule PDF emphasizes the importance of early issue detection to prevent mechanical failures․ Regular inspections, as outlined in the guide, help identify common problems such as worn brake pads, low fluid levels, or uneven tire wear․ By addressing these issues early, owners can avoid costly repairs and ensure optimal vehicle performance․ The schedule includes checkpoints for critical systems like the engine, transmission, and suspension, allowing for proactive maintenance․ Early detection also enhances safety, as potential hazards are resolved before they escalate․ This approach not only saves money but also prolongs the lifespan of the Subaru Forester, ensuring it runs reliably for years to come․
Creating a Personalized Maintenance Plan
A personalized maintenance plan tailors the 2022 Subaru Forester’s upkeep to individual driving habits and conditions, ensuring timely service and optimal vehicle health․ Use the PDF guide to customize intervals and track progress, adapting as needed for reliability and longevity․
Customizing the Schedule Based on Driving Conditions
Customizing the maintenance schedule based on driving conditions ensures the 2022 Subaru Forester operates efficiently in various environments․ For extreme temperatures, frequent towing, or off-road use, adjust service intervals․ Drivers in dusty or salty areas may need more frequent tire rotations and brake inspections․ The PDF guide provides recommendations for high-mileage or severe-duty driving․ Regularly review and adapt the schedule to match your specific usage patterns․ This proactive approach helps prevent premature wear and ensures long-term reliability․ Always consult the official Subaru maintenance schedule PDF for precise guidance tailored to your driving habits and local conditions․ This ensures optimal performance and extends the vehicle’s lifespan․
Tracking Maintenance History for Future Reference
Tracking maintenance history is essential for monitoring the health of your 2022 Subaru Forester and ensuring adherence to the recommended schedule․ Use the maintenance schedule PDF as a log to record completed services, including oil changes, tire rotations, and inspections․ Digital tools or apps can also help organize and store this information․ Keeping detailed records provides a clear overview of your vehicle’s maintenance history, which can be valuable for resale and warranty purposes․ Regular updates ensure transparency and accountability, helping you stay on track with future maintenance needs․ Refer to the owner’s manual or the PDF guide for additional tips on organizing and preserving maintenance records effectively․
Adhering to the 2022 Subaru Forester maintenance schedule ensures reliability, optimal performance, and cost savings․ Regular upkeep protects your investment and keeps your vehicle running smoothly for years․
Final Thoughts on the Importance of Proper Maintenance

Proper maintenance is essential for preserving the longevity and performance of your 2022 Subaru Forester․ By following the recommended schedule, you ensure reliability, prevent unexpected repairs, and maintain warranty compliance․ Regular checks and timely replacements of parts like oil, tires, and brakes are crucial for safety and efficiency․ Additionally, proper care enhances resale value and reduces long-term ownership costs․ Always refer to the official Subaru maintenance schedule PDF for guidance․ Consistent upkeep not only protects your investment but also ensures your vehicle remains a trusted companion for years to come․
Resources for Further Assistance
For detailed guidance on maintaining your 2022 Subaru Forester, consult the official Subaru maintenance schedule PDF available on their website․ Subaru dealerships also provide personalized support and can answer specific questions․ Additionally, the Subaru owner’s manual offers comprehensive insights into recommended maintenance practices․ Online forums and communities dedicated to Subaru owners are excellent resources for shared experiences and troubleshooting tips․ If you encounter issues or need clarification, contacting Subaru customer service or visiting a certified service center is highly recommended․ These resources ensure you have all the information needed to keep your Forester in optimal condition․