Archive: September 10, 2024

printable knot tying guide pdf

Discover the world of knot tying with our printable guides!

Master essential knots for various activities like camping and sailing.

Download easy-to-follow instructions and illustrations to learn at your own pace.

Perfect for beginners, these guides offer a practical approach to knot tying.

Essential Knots for Beginners

Embark on your knot-tying journey with these fundamental knots!

Learn the bowline, square knot, and clove hitch for versatile applications.

Our printable guides provide clear, step-by-step instructions for easy mastery.

These essential knots are a must-know for any outdoor enthusiast.

Bowline Knot: The King of Knots

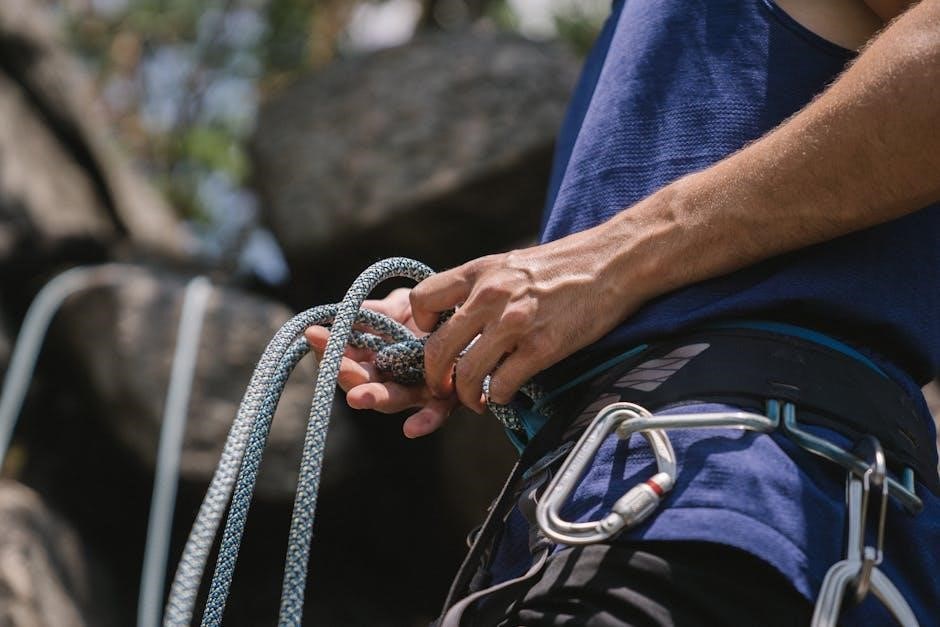
The bowline knot, often called the “King of Knots,” is an essential skill for anyone venturing outdoors.

It’s renowned for creating a secure, fixed loop at the end of a rope, proving invaluable in various situations.

Our printable knot tying guides offer clear instructions on mastering this reliable knot.

Easy to tie and untie, the bowline is a time-tested knot that every outdoors person should know.

The Bowline is also one of the four basic maritime knots, the other three are the Figure-Eight Knot, the Reef Knot and the Clove Hitch.

It is a strong, reliable and stable knot, sometimes even referred to as the King of Knots.

The Rabbit comes out of the hole … (a) Purpose: To be used as a safety knot. (b) Tying the Knot: Take the running end of the rope and form a loop. Place the running end through the loop.

Download our guides today and learn to confidently tie this crucial knot for any adventure.

Considered one of the most essential knots.

So called “The King of Knots”.

Master this knot now with our printable guides!

Square Knot: Tying Two Ropes Together

The square knot is designed for joining two ropes of similar diameter.

It’s a fundamental knot, often used in first aid and everyday situations where securely connecting ropes is necessary.

Our printable knot tying guides provide step-by-step instructions, making it easy to learn and remember how to tie a perfect square knot.

Mastering this knot is essential for various craft projects, for instance tying bandanas, macramé, etc.

Square knots slip when you tie them with nylon rope. A square knot will also slip if it is not under tension.

Our guide provides essential safety information too.

It is useful in many situations and should be a staple in your knot-tying arsenal.

With our guide, you will master this knot!

Square Knot Instructions: Remember this…

Download our printable guide now!

Practice tying the perfect square knot.

Clove Hitch: A Useful Hitch for Various Purposes

The clove hitch is a versatile knot primarily used for attaching a rope to a pole, post, or ring.

It’s valued for its simplicity and ease of tying, making it a go-to knot in various scenarios.

Our printable knot tying guides provide clear, step-by-step instructions on how to create a secure clove hitch.

With our guide, you will master this knot!

Learn to use this hitch for camping, boating, and securing loads.

The clove hitch is a quick and reliable knot for temporary fastening.

Our downloadable PDF makes learning this knot accessible and convenient.

Practice tying the clove hitch with our detailed diagrams.

Whether you’re a beginner or experienced, our guide offers valuable insights.

Download now and enhance your knot-tying skills.

Master the clove hitch and be prepared for any situation.

The clove hitch is a quick and reliable knot for temporary fastening.

The clove hitch is a quick and reliable knot for temporary fastening.

Types of Knots and Their Uses

Explore various knots and their practical applications.

Our printable guides cover knots for camping, sailing, and fishing.

Learn which knot suits each specific task effectively;

Enhance your skills and knowledge today!

Knots for Camping and Outdoor Activities

When venturing into the great outdoors, a solid understanding of essential knots is paramount for safety and efficiency. Our printable knot tying guides offer comprehensive instructions on knots specifically tailored for camping and various outdoor activities. These knots are crucial for securing tents, creating makeshift shelters, hanging food to protect it from wildlife, and even for first aid situations.

For camping, learn the versatile taut-line hitch to adjust tent lines easily, ensuring your shelter remains secure in fluctuating weather conditions. The timber hitch is invaluable for dragging logs or securing firewood. If you’re setting up a bear bag, master the art of the counter hitch to hoist your food safely away from curious critters.

Beyond the campsite, these knot-tying skills can prove invaluable for hiking, climbing, and other outdoor pursuits. Learn to tie a bowline, a reliable knot for creating a fixed loop, perfect for rescue scenarios or securing gear to a fixed point. The figure-eight knot is also a valuable knot.

Knots for Sailing and Boating

Embarking on a sailing or boating adventure requires a specialized set of knot-tying skills to ensure safety and efficient operation. Our printable knot tying guides offer detailed instructions on essential knots specifically designed for maritime use. From securing lines to mooring, to adjusting sails, these knots are fundamental for any sailor or boater.

The bowline knot, often hailed as the “King of Knots,” is a staple for creating a reliable loop at the end of a rope, crucial for mooring and attaching lines to cleats. The clove hitch provides a secure way to fasten a rope to a post or rail, while the figure-eight knot serves as a stopper knot, preventing lines from running out of blocks or fairleads.

For sail handling, learn to tie a reef knot (also known as a square knot) for reefing sails and the sheet bend for joining two ropes of different sizes. Mastering these knots will enable you to navigate the waters with confidence and competence, ensuring a safe and enjoyable experience on board.

Knots for Fishing

Anglers rely on a variety of specialized knots to ensure their lines hold strong and their lures are securely attached. Our printable knot tying guides provide clear, step-by-step instructions for mastering the essential knots for fishing. These knots are designed to maintain line strength and prevent slippage, crucial for landing that prized catch.

The improved clinch knot is a popular choice for attaching fishing line to hooks, swivels, and lures, offering a reliable and sturdy connection. The Palomar knot is known for its exceptional strength and is ideal for braided lines. For tying leaders, the blood knot creates a smooth and secure connection between two lines of similar diameter.

Learn to tie the surgeon’s loop for creating loops in your leader for attaching droppers or flies. With our comprehensive guides, you can confidently tie these knots, ensuring your fishing gear is ready for any situation on the water. Perfect your technique and increase your chances of success with our easy-to-follow instructions.

Macrame Knots for Beginners

Macrame, the art of knotting cords to create decorative patterns, is a fantastic craft for beginners. Our printable knot tying guides offer a simple and accessible introduction to the world of macrame. Learn to create beautiful wall hangings, plant hangers, and more with our easy-to-follow instructions.

The square knot is the foundation of many macrame projects, providing a stable and versatile base for intricate designs. The half knot creates a spiral pattern, adding texture and visual interest to your creations. Discover how to use lark’s head knots to attach cords to a dowel or ring, forming the starting point for your macrame piece.

Our guides include detailed diagrams and step-by-step instructions, ensuring you can master these essential knots with ease. Explore different cord types and experiment with various knot combinations to create your own unique macrame designs. With our help, you’ll be knotting like a pro in no time! Unlock your creative potential and dive into the rewarding world of macrame.

Understanding Knot Tying Terminology

Grasp the lingo!

Learn ‘working end’ vs. ‘tail end’.

Understand terms for confident knot tying.

Master the language of knots.

Working End vs. Tail End

Navigating the world of knot tying requires understanding fundamental terminology.

Two critical terms are the “working end” and the “tail end” of a rope.

The working end is the active part you manipulate to form the knot.

It’s the end you’re actively using to tie, weave, and secure the knot.

In contrast, the tail end, also known as the “standing end,” is the inactive portion.

The tail end simply provides additional length for the knot.

Identifying these parts is crucial for following instructions.

Confusing them can lead to incorrectly tied knots.

Imagine the working end as the “artist” creating the knot.

The tail end serves as the “canvas” that the knot is tied around.

Remember, the tail end should always be long enough.

It should provide a safe margin.

This ensures that the knot won’t unravel under tension.

Mastering these terms is essential for knot tying success.

Good luck!

Tips for Successful Knot Tying

To tie knots successfully, practice regularly and use clear instructions.

Pay attention to details and ensure knots are properly dressed and set.

Tighten knots carefully to secure them effectively.

Tie, Dress, and Set

The “Tie, Dress, and Set” method is crucial for creating reliable and neat knots. These three steps are essential for ensuring that your knot functions as intended and remains secure under pressure. First, “Tie” the knot according to the instructions, carefully following each step to form the basic structure. Next, “Dress” the knot by arranging the strands so they lie neatly and correctly. This involves removing any twists or crossings that might weaken the knot or cause it to jam. A well-dressed knot looks symmetrical and organized. Finally, “Set” the knot by gradually tightening it. This process ensures that all parts of the knot are properly seated and that it will hold firmly. Avoid jerking the knot tight, as this can damage the rope fibers and reduce the knot’s strength. Each step is vital for a safe, functional knot.

Safety Considerations When Tying Knots

When tying knots, safety should always be the top priority. Regularly check your knots, and retie them often, especially if they are subjected to significant stress or adverse conditions. Always use the appropriate knot for the task at hand; a wrongly chosen knot can fail under pressure. Inspect your ropes for wear and tear before each use, and replace any damaged ropes immediately. Be aware that certain materials, like nylon, can cause knots to slip if not properly secured. Ensure knots are tied correctly, following instructions carefully, and practice tying them until you can confidently execute them under various circumstances. Avoid tying knots in adverse conditions where your attention might be compromised. After tying, double-check that the knot is properly dressed and set to prevent slippage or failure. Understanding these safety precautions is crucial for preventing accidents and ensuring the reliable performance of your knots in any situation.

Where to Find Printable Knot Tying Guides

Finding reliable printable knot tying guides is easier than ever with numerous online resources. Many websites offer free PDF downloads with detailed instructions and illustrations for various knots. Start by searching online for terms like “printable knot tying guide PDF” or “knot tying manual download” to discover a wealth of options. Websites dedicated to outdoor activities such as camping, sailing, fishing, and climbing often provide specialized knot guides tailored to those specific needs. Online marketplaces and crafting sites also offer printable guides, some of which may focus on macrame or decorative knots. Look for guides that include step-by-step photos or diagrams to ensure clarity and ease of understanding. Before downloading, check reviews or ratings to ensure the guide’s accuracy and user-friendliness. Always download from reputable sources to avoid potentially harmful files. With a little searching, you can find the perfect printable guide to suit your knot tying needs.

arcoaire furnace manual

Arcoaire Furnace Manual: A Comprehensive Guide

Welcome! This guide provides a detailed overview of Arcoaire furnace manuals, crucial for understanding your heating system. Proper use ensures safety, efficient operation, and access to warranty information. Find the right manual and keep your home comfortable!

Arcoaire furnaces are designed for durability, energy efficiency, and reliability, delivering total home comfort. Combining the warmth of natural gas with a quiet, efficient blower motor, they ensure comfort throughout the cold seasons. These furnaces, part of the Arcoaire Heating & Cooling Products line, offer a range of models to suit various needs and home sizes.

Understanding your Arcoaire furnace is vital for optimal performance and safety. Each furnace is designed for quality and should be regularly maintained. Parts Town has real OEM Arcoaire parts for your furnace, air conditioner, and HVAC system so it can continue to keep you warm.

Arcoaire dealers are ready to help you find the right fit for your home.

Understanding Your Arcoaire Furnace Manual

Your Arcoaire furnace manual contains vital information regarding safety procedures, proper handling of components, and combustion processes. Mastering the manual is crucial for safe and efficient furnace operation, ensuring longevity.

Importance of the Manual

The Arcoaire furnace manual is your primary resource for safe operation and maintenance. It acts as a bible, containing vital information about your heating system. The manual outlines safety procedures, ensuring proper handling of gas lines, electrical components, and combustion processes. Understanding these procedures is paramount for preventing accidents and ensuring the safe operation of your furnace.

Furthermore, the manual provides guidance on regular maintenance, helping you keep your system in top form. It includes troubleshooting tips for common issues, potentially saving you time and money on repairs. Additionally, the manual details warranty information, outlining the terms and how to claim warranty benefits.

By consulting the manual, you ensure your Arcoaire system delivers the total home comfort you expect.

Safety Procedures Outlined in the Manual

The Arcoaire furnace manual dedicates significant sections to safety. It emphasizes precautions regarding gas lines, electrical components, and combustion processes, crucial for preventing hazards. Always prioritize these guidelines to safeguard your home and family.

The manual provides detailed instructions on leak detection, proper ventilation, and emergency shutdown procedures. It warns against unqualified personnel performing installations or repairs, highlighting the risk of equipment malfunction, property damage, or even personal injury.

Furthermore, the manual stresses the importance of adhering to local building codes and safety standards. Regular inspections and maintenance, as outlined, contribute to preventing potential safety issues. The manual serves as a constant reminder to prioritize safety when operating and maintaining your Arcoaire furnace.

By following these procedures, you ensure a safe and comfortable home environment.

Understanding Signal Words: Danger, Warning, Caution, and Note

Arcoaire furnace manuals utilize signal words to highlight the severity of potential hazards or important information. Danger indicates immediate hazards that will result in severe personal injury or death. Warning signifies hazards or unsafe practices that could lead to severe injury or death.

Caution alerts to hazards or unsafe practices that may result in minor personal injury or product/property damage. Lastly, Note is used to emphasize suggestions that enhance installation, reliability, or operation.

Recognizing these signal words is crucial for safe furnace operation and maintenance. Pay close attention to instructions accompanied by these terms to prevent accidents and ensure optimal performance. Understanding these distinctions empowers you to respond appropriately in various situations.

By adhering to these guidelines, you can mitigate risks and maintain a safe environment.

Arcoaire Furnace Models and Manuals

Finding the correct manual is essential. Arcoaire offers various furnace models, each with unique specifications. Locate your model number to access the appropriate manual for installation, maintenance, and troubleshooting guidance.

Locating the Correct Manual for Your Model

Finding the correct manual for your Arcoaire furnace model is crucial for ensuring proper installation, maintenance, and troubleshooting. Start by locating the model number, typically found on a data plate affixed to the furnace itself. This plate may be inside the unit’s control compartment or on the exterior casing.

Once you have the model number, you can search online using search engines or by visiting the Arcoaire website or other sites like ManualsLib, which hosts a library of manuals. Entering the full model number will yield the most accurate results.

If you’re unable to find a digital copy, consider contacting an Arcoaire dealer or HVAC professional. They may be able to provide you with the correct manual or point you in the right direction. Having the right manual ensures safe and effective furnace operation.

Popular Arcoaire Furnace Models

Arcoaire offers a range of furnace models designed for varying needs and efficiency levels. Some popular models include the Arcoaire Performance Series gas furnaces, known for their durability and comfort. These furnaces often come with a 10-year parts limited warranty, providing homeowners with peace of mind.

Other notable models include the N8MSN Series, an 80 single-stage furnace with a PSC motor, and the N9MP1, a 90 single-stage gas furnace. The A Series furnaces are also popular, offering single-stage operation with a multi-speed ECM.

Each model boasts unique features, such as variable-speed blowers for enhanced temperature control and dehumidification. Choosing the right model depends on your heating requirements and energy efficiency goals. Always consult the specific manual for your model for detailed information.

Installation and Setup (Referencing Manual Content)

Proper installation is key. Consult your manual for step-by-step instructions, including venting requirements. Installation must conform to local codes and the Natural Fuel Gas Code for safety and optimal performance.

Step-by-Step Installation Instructions

The installation process, as detailed in your Arcoaire furnace manual, must meticulously follow each step to ensure safety and functionality. Begin by carefully unpacking the furnace and inspecting for any shipping damage. Next, refer to the manual for specific clearance requirements, ensuring adequate space around the unit for maintenance and proper airflow. Securely position the furnace on a level surface, following the manual’s guidelines for base support. Connect the gas supply line, adhering to all local and national codes, and perform a thorough leak test. Wiring connections must strictly adhere to the wiring diagram provided in the manual, paying close attention to voltage and grounding requirements. Finally, configure the thermostat settings according to the manual’s recommendations for optimal comfort and energy efficiency.

Venting Requirements and Guidelines

Proper venting is vital for safe and efficient Arcoaire furnace operation, and your manual provides specific guidelines. Incorrect venting can lead to dangerous carbon monoxide buildup. Always use the venting materials specified in the manual to ensure compatibility and prevent corrosion. Maintain the correct vent pipe diameter as indicated to facilitate proper exhaust flow. Ensure the vent system slopes upward away from the furnace to prevent condensate from draining back into the unit. All vent pipe connections must be airtight and sealed according to the manual’s instructions. Inspect the venting system regularly for any signs of damage or obstruction, and address any issues promptly. If unsure about any aspect of the venting process, consult a qualified HVAC technician.

Maintenance and Troubleshooting (Using Manual Information)

Your Arcoaire furnace manual is key for maintenance and troubleshooting. Regular checks and prompt issue resolution ensure efficiency and longevity. Refer to it for specific procedures and safety advice.

Regular Maintenance Procedures

Maintaining your Arcoaire furnace is critical for optimal performance and longevity. The manual outlines key steps, like filter replacement, which should occur regularly, often every one to three months, depending on usage and air quality. Inspecting the burner and flame sensor for cleanliness is also important; a clean flame sensor ensures proper ignition. Check the venting system for any obstructions or damage, ensuring safe exhaust of combustion gases. Lubricate moving parts, as specified in your manual, to reduce friction and wear.

Schedule professional inspections annually. Technicians can assess components like the heat exchanger and gas valve, ensuring they operate safely and efficiently. They can also perform a combustion analysis to optimize fuel usage and minimize emissions. Keep detailed maintenance records to track when services were performed, facilitating warranty claims and informed decision-making. This proactive approach ensures reliable heating and avoids costly repairs.

Troubleshooting Common Issues

Your Arcoaire furnace manual is your first resource when issues arise. If your furnace isn’t heating, start by checking the thermostat settings and ensuring the power switch is on. A common cause is a tripped circuit breaker; reset it if necessary. Consult the manual for error codes displayed on the control board, as these pinpoint specific problems. A dirty air filter can restrict airflow, causing overheating; replace it promptly.

If the furnace cycles on and off frequently, this could indicate a faulty flame sensor or a blocked vent. If you smell gas, immediately turn off the gas supply and contact a qualified technician. For more complex issues, like a malfunctioning blower motor or gas valve, professional diagnosis and repair are essential to ensure safety and proper functioning. Avoid attempting repairs beyond your skill level; always prioritize safety.

Warranty Information for Arcoaire Furnaces

Arcoaire furnaces offer a 10-year parts limited warranty. Understanding the terms is crucial. This section explains the warranty, how to claim it, and what is covered, ensuring peace of mind for your investment.

Understanding the Warranty Terms

Arcoaire Performance Series gas furnaces generally come with a 10-year parts limited warranty. This means that for a decade after the installation date, specific components of your furnace are covered against defects in materials or workmanship. It is important to register your product after installation. The warranty typically covers parts needed for repairs, but may exclude labor costs or certain types of damage. Factors like proper installation and maintenance play a significant role in maintaining warranty validity. Regular maintenance, performed by qualified technicians, helps prevent issues and keeps the warranty intact. Be sure to carefully read the warranty document that comes with your specific furnace model to fully grasp the terms, conditions, and exclusions.

How to Claim Warranty

If your Arcoaire furnace requires repair and falls within the warranty period, you’ll need to initiate a warranty claim. First, consult your furnace manual for the specific warranty claim procedure outlined by Arcoaire. Typically, this involves contacting an authorized Arcoaire dealer or a qualified HVAC technician. They can diagnose the issue and determine if it’s covered under the warranty terms. Be prepared to provide proof of purchase, the furnace model number, and the installation date. The technician will then contact Arcoaire to file the claim and obtain authorization for the repair. Ensure that all repairs are performed by authorized personnel to avoid voiding the warranty. Keep records of all service visits, diagnoses, and repairs performed under warranty for future reference.

home run inn pizza cooking instructions

To perfectly cook a Home Run Inn pizza, start by removing all packaging. Position your oven rack in the middle. Preheat your oven to 450°F (232°C). Place the pizza directly on the middle rack and bake for 15-20 minutes.

Oven Preparation

Before embarking on the culinary journey of baking a Home Run Inn pizza, meticulous oven preparation is paramount. This crucial step ensures that your pizza achieves the coveted golden-brown crust and perfectly melted cheese that defines pizza perfection. Begin by positioning the oven rack to the middle position. This placement facilitates even heat distribution, preventing the crust from burning while ensuring the toppings are thoroughly cooked.

Next, preheat your oven to a precise temperature of 450°F (232°C). This high heat is instrumental in achieving the desired crispy crust and ensuring the cheese melts evenly and becomes delightfully bubbly. While your oven preheats, take a moment to remove the pizza from all packaging, including any shrink wrap. This step is essential to prevent any unwanted materials from coming into contact with your pizza during the baking process.

Once the oven has reached its optimal temperature, you are ready to place your Home Run Inn pizza inside. Remember, proper oven preparation is the foundation for a delicious, restaurant-quality pizza experience in the comfort of your own home.

Recommended Oven Temperature

Achieving the ideal crust and melted cheese for your Home Run Inn pizza hinges significantly on selecting the correct oven temperature. The gold standard, as recommended by culinary experts, is 450°F (232°C). This high temperature is critical for replicating the pizzeria-style experience in your own kitchen.

Baking at 450°F allows the crust to achieve a desirable crispiness, preventing it from becoming soggy or undercooked. Simultaneously, this temperature ensures that the cheese melts evenly and develops a bubbly, golden-brown top. The balance between a crispy crust and perfectly melted cheese is what elevates a good pizza to an exceptional one.

While 450°F is the generally recommended temperature, it’s essential to remember that ovens can vary. If you notice that your pizza is cooking too quickly or the crust is browning excessively before the cheese is fully melted, you might consider slightly reducing the temperature by 25°F. Conversely, if your pizza is taking longer than expected to cook, a slight temperature increase might be necessary.

Optimal Baking Time

Determining the optimal baking time is crucial for achieving that perfect Home Run Inn pizza. While the recommended oven temperature sets the stage, the right baking time ensures the crust is golden brown and the cheese is melted to bubbly perfection. Generally, the ideal baking time falls within the range of 15 to 20 minutes.

This timeframe allows the pizza to cook evenly, preventing the crust from becoming too hard or the cheese from remaining unmelted. However, various factors can influence the actual baking time required. For instance, the thickness of the crust and the amount of toppings can affect how quickly the pizza cooks.

Therefore, it’s essential to keep a close eye on your pizza while it’s baking. Watch for visual cues such as the crust turning golden brown and the cheese bubbling and slightly browning. If you notice these signs before the 15-minute mark, it’s best to remove the pizza to prevent overcooking. Conversely, if the pizza still appears undercooked after 20 minutes, you may need to extend the baking time slightly.

Placement in the Oven

The placement of your Home Run Inn pizza within the oven is a key factor in ensuring even cooking and a perfectly baked result. For optimal heat distribution and consistent cooking, the recommended placement is on the middle rack of your oven. This position allows the pizza to be equidistant from the top and bottom heating elements, promoting balanced cooking of both the crust and the toppings.

Placing the pizza too close to the top heating element can lead to the cheese and toppings browning too quickly, potentially burning them before the crust is fully cooked. Conversely, placing the pizza too low in the oven can result in a pale, undercooked crust while the toppings may not be adequately heated.

Using the middle rack ensures that the pizza receives consistent heat from all directions, allowing the crust to become golden brown and crispy while the cheese melts evenly and the toppings cook thoroughly. This placement is particularly important for frozen pizzas like Home Run Inn, as it helps to overcome any potential cold spots and ensures that the pizza cooks evenly from edge to edge.

No Pan or Cookie Sheet

When preparing a Home Run Inn pizza, it’s crucial to avoid using a pan or cookie sheet. Placing the pizza directly on the oven rack is essential for achieving the desired crispy crust. Using a pan or cookie sheet can trap moisture underneath the pizza, leading to a soggy or undercooked crust.

The direct contact with the oven rack allows for better air circulation around the pizza, ensuring even heat distribution and promoting a crispier texture. This method also helps to prevent the bottom of the pizza from becoming overly soft or doughy.

By placing the pizza directly on the rack, you’re essentially replicating the cooking environment of a traditional pizzeria oven, where pizzas are baked on a stone or directly on the oven floor. This method allows the crust to develop a desirable level of crispness and a slightly charred flavor, enhancing the overall taste and texture of the pizza. So, skip the pan and let your Home Run Inn pizza bake directly on the rack for the best results.

Microwave Instructions

For a quick and convenient way to enjoy your Home Run Inn pizza, microwave instructions are available. Place the pizza on a microwave-safe browning disk, ensuring the silver side is facing up and touching the pizza crust. This browning disk helps to crisp the crust, mimicking the effect of oven baking.

Microwave the pizza for approximately 2 minutes, then carefully rotate it halfway to ensure even cooking. Be cautious, as the pizza and browning disk will be hot to the touch. Continue microwaving for an additional 2 to 3 minutes, or until the cheese is fully melted in the center.

The pizza is done when the cheese is melted and the edges appear golden brown. Remember that microwave wattages can vary, so it’s essential to adjust the cooking time accordingly. Keep a close eye on the pizza to prevent overcooking or burning. This method is best suited for single slices or smaller portions.

Always allow the pizza to cool slightly before serving, as the cheese can be extremely hot.

Checking for Doneness

Determining when your Home Run Inn pizza is perfectly cooked involves a few key visual and tactile cues. The most obvious sign is the cheese: it should be completely melted and bubbly, with a slightly golden-brown hue appearing on the surface. Look for the cheese to be evenly melted across the pizza, with no unmelted patches.

The crust is another important indicator. The edges should be a golden-brown color and feel firm to the touch. If the crust is still pale or doughy, it needs more time in the oven. You can gently lift the edge of the pizza with a spatula to check the underside of the crust; it should be lightly browned and crispy.

Furthermore, the toppings should look heated through and slightly caramelized. Any meat toppings should be cooked thoroughly, and vegetables should be tender. If you’re unsure, you can use a fork to gently poke the center of the pizza. If the crust feels firm and the cheese is melted, it’s likely done. Remember, ovens vary, so these are general guidelines.

Adjusting for Oven Variation

Every oven is unique, and its performance can significantly impact the cooking time and temperature required for a perfect Home Run Inn pizza. Some ovens run hotter or cooler than their set temperature, while others may have hot spots that cause uneven cooking. Therefore, it’s crucial to understand your oven’s quirks and adjust accordingly.

If you find that your pizzas consistently cook too quickly or the crust burns before the cheese melts, try lowering the oven temperature by 25 degrees Fahrenheit. Conversely, if your pizzas take longer to cook, or the cheese doesn’t melt properly, increase the temperature slightly.

Keep a close watch on the pizza during baking. If one side is browning faster than the other, rotate the pizza halfway through cooking. Use an oven thermometer to ensure your oven is reaching the correct temperature. Adjustments may also be needed based on your altitude. With a bit of experimentation, you’ll be able to achieve a perfect bake every time.

Softer Crust Option

For those who prefer a softer crust on their Home Run Inn pizza, a slight adjustment to the baking process can make all the difference. Instead of placing the pizza directly on the oven rack, use a baking sheet. This method helps to shield the bottom of the crust from direct heat, preventing it from becoming overly crispy;

Preheat your oven to a slightly lower temperature, around 425°F (220°C). The lower temperature allows the pizza to cook more gently, resulting in a softer texture. Place the pizza on the baking sheet and bake for approximately 15-20 minutes, or until the cheese is melted and bubbly, and the crust is golden brown around the edges.

Keep a close eye on the pizza to ensure that the cheese is fully melted and the toppings are heated through. If you find that the crust is still getting too crispy, you can try placing a sheet of aluminum foil underneath the baking sheet for added insulation. Experiment with these adjustments to achieve your ideal level of crust softness.

Grilling Instructions

For a unique and smoky flavor, grilling your Home Run Inn pizza is an excellent option. First, ensure your grill is clean and preheated to a medium-high temperature. Whether using a gas or charcoal grill, aim for a consistent heat across the cooking surface.

Remove the frozen pizza from its packaging. Place the pizza directly onto the grill grates. Close the grill lid and cook for approximately 7-9 minutes, rotating it halfway through to ensure even cooking. Monitor the pizza closely to prevent burning. The crust should be golden brown and slightly charred, and the cheese should be melted and bubbly.

Grilling times may vary depending on your grill and the ambient temperature. Use a spatula to carefully lift the pizza and check the bottom crust for doneness. If the crust is browning too quickly, reduce the heat or move the pizza to a cooler part of the grill. Once cooked to perfection, carefully remove the pizza from the grill, slice, and serve immediately. Enjoy the smoky, delicious taste of grilled Home Run Inn pizza!

instructions for cuisinart popcorn maker

Cuisinart Popcorn Maker: A Comprehensive Guide

This comprehensive guide provides you with everything you need to know about your Cuisinart popcorn maker. From initial setup to delicious recipes‚ we’ll cover all the bases so you can enjoy perfect popcorn every time. Get ready for a tasty experience!

Initial Setup and Assembly

Before you start popping kernels‚ it’s crucial to properly set up and assemble your Cuisinart popcorn maker. First‚ unpack all the components from the box‚ carefully removing any protective wrapping. Ensure you have the base‚ kettle (if applicable)‚ kernel catcher‚ screen‚ tilt door‚ and measuring cup. Wipe down the housing‚ kettle‚ and accessories with a damp cloth to remove any dust accumulated during shipping.

Next‚ follow the specific assembly instructions for your model. For some models‚ this involves inserting the kernel catcher and screen at the bottom of the housing to separate unpopped kernels. Attach the tilt door securely to its hinges. Ensure the kettle is properly seated in the base if your model has one. Verify that all parts are correctly aligned and locked into place.

Finally‚ before plugging in the popcorn maker‚ double-check that all components are dry and securely assembled. Refer to your instruction manual for any model-specific instructions or diagrams. Once you’ve completed these steps‚ your Cuisinart popcorn maker is ready for its first use! Remember safety always comes first.

Identifying the Components

Understanding each component of your Cuisinart popcorn maker is essential for proper use and maintenance. The main housing is the body of the unit‚ often made of durable plastic or metal. The kettle‚ found in some models‚ is where the kernels are popped and typically features a non-stick surface. The kernel catcher and screen‚ usually located at the bottom‚ separate unpopped kernels from the finished popcorn.

The tilt door allows the popped popcorn to exit the machine and fall into a serving bowl. A measuring cup is included to ensure you use the correct amount of kernels for each batch. Some models also feature a butter warming compartment or cup‚ allowing you to melt butter while the popcorn is popping.

Familiarize yourself with the power switch or buttons‚ which control the popping and mixing functions. It’s also important to identify the power cord and ensure it’s in good condition before each use. Consulting your specific model’s instruction manual will provide detailed diagrams and descriptions of each part‚ ensuring you are fully acquainted with your Cuisinart popcorn maker. Knowing the function of each part contributes to safe and efficient popcorn making.

Step-by-Step Popping Instructions

To enjoy freshly popped popcorn with your Cuisinart maker‚ follow these simple steps. First‚ ensure the popcorn maker is properly assembled‚ with all components correctly in place. Use the provided measuring cup to add the appropriate amount of popcorn kernels to the kettle or popping chamber‚ adhering to the manufacturer’s recommendations for your specific model. Avoid overfilling‚ as this can lead to uneven popping or damage to the unit.

If your model has a butter warming feature‚ add the desired amount of butter to the designated compartment. Close the lid or secure the popping chamber according to the instructions. Plug the power cord into a suitable electrical outlet.

Next‚ turn on the popcorn maker by sliding the power switch to the “Pop” or “On” position; Allow the machine to run its cycle‚ listening for the popping to slow down significantly. Once the popping has ceased‚ turn off the popcorn maker and allow any remaining popcorn to empty into the serving bowl. Exercise caution‚ as the unit and popcorn will be hot. Add your favorite seasonings and enjoy! Always unplug the unit and allow it to cool completely before cleaning.

Using the Measuring Cup

The measuring cup included with your Cuisinart popcorn maker is a crucial component for achieving consistently great results. It ensures you use the correct amount of kernels‚ preventing overfilling and uneven popping. Different Cuisinart models may have different cup sizes‚ so always refer to your instruction manual for the specific measurement recommended for your machine. Typically‚ the cup will be marked with measurements for both kernels and‚ if applicable‚ oil.

When using the measuring cup‚ fill it to the indicated line for kernels‚ making sure not to pack them down. Level off the top for an accurate measurement. Carefully pour the kernels into the popping chamber or kettle. If your model includes a butter melting feature‚ the measuring cup may also have a section for butter. Follow the instructions to melt the butter while the popcorn is popping‚ enhancing the flavor.

Always clean the measuring cup after each use to remove any residue and ensure accurate measurements in the future. Proper use of the measuring cup is key to achieving perfectly popped popcorn every time‚ maximizing the performance of your Cuisinart popcorn maker and preventing potential issues.

Adding Flavorings and Toppings

Once your Cuisinart popcorn maker has produced a batch of fluffy‚ perfectly popped popcorn‚ the real fun begins: adding flavorings and toppings! There’s a world of possibilities beyond simple butter and salt. For a classic sweet treat‚ consider drizzling melted butter and sprinkling with granulated sugar or cinnamon sugar. Experiment with different types of sugars‚ like brown sugar or powdered sugar‚ for unique twists.

For savory popcorn‚ try adding melted butter and then tossing with grated Parmesan cheese‚ garlic powder‚ or even a sprinkle of nutritional yeast for a cheesy flavor. Spice things up with chili powder‚ smoked paprika‚ or a dash of cayenne pepper. If you’re feeling adventurous‚ try combining sweet and savory elements‚ such as caramel popcorn with a sprinkle of sea salt.

To ensure even distribution of flavorings‚ melt butter or oil separately and drizzle it over the popcorn while tossing gently. For dry toppings‚ sprinkle them gradually while mixing to prevent clumping. Remember to add toppings immediately after popping while the popcorn is still warm‚ allowing them to adhere properly. With a little creativity‚ your Cuisinart popcorn maker can become a gateway to endless flavor combinations.

Cleaning and Maintenance Procedures

Maintaining your Cuisinart popcorn maker is essential for its longevity and optimal performance. Always unplug the unit and allow it to cool completely before cleaning. Never immerse the base of the unit in water or any other liquid‚ as this could damage the electrical components. Instead‚ wipe the exterior with a damp cloth to remove any dust or spills.

Removable parts‚ such as the popping chute and butter warming cup‚ can typically be washed with warm‚ soapy water. Ensure all soap residue is thoroughly rinsed off before reassembling. Avoid using abrasive cleaners or scrubbing brushes‚ as they can scratch or damage the surfaces. For models with a non-stick cooking plate‚ gently wipe it with a soft cloth or sponge to remove any remaining kernels or oil residue.

If you notice any buildup or stubborn residue‚ try soaking the affected parts in warm‚ soapy water for a few minutes before cleaning. Regularly check for any loose screws or damaged components‚ and tighten or replace them as needed. Proper cleaning and maintenance will not only keep your Cuisinart popcorn maker functioning smoothly but also ensure that your popcorn remains fresh and delicious every time.

Safety Precautions

When using your Cuisinart popcorn maker‚ safety should always be your top priority. Before operating the appliance‚ carefully read all instructions and warnings provided in the user manual. Ensure the popcorn maker is placed on a stable‚ flat surface away from water sources and flammable materials. Always supervise the popcorn maker while it is in use‚ and never leave it unattended.

Avoid touching hot surfaces during and immediately after operation‚ as the unit can become very hot. Use oven mitts or pot holders when handling the popping chute or removing popped popcorn. Never attempt to move the popcorn maker while it is in operation or still hot. Allow the unit to cool completely before cleaning or storing it.

Do not overfill the popping chamber with kernels‚ as this can cause the popcorn maker to malfunction or create a fire hazard. Never add oil‚ butter‚ or other seasonings directly to the popping chamber unless specifically instructed by the manufacturer. Keep the power cord away from hot surfaces and do not use the popcorn maker if the cord is damaged. If you notice any unusual noises‚ smells‚ or smoke‚ immediately turn off and unplug the unit.

Troubleshooting Common Issues

Even with careful use‚ you might encounter some common issues while using your Cuisinart popcorn maker. If the popcorn isn’t popping‚ ensure the unit is properly plugged into a functioning outlet. Verify that the power switch is in the “Pop” position and that the heating element is activating. Also‚ check if you’ve added the correct amount of kernels; too few or too many can affect popping performance.

If kernels are burning‚ it could be due to overheating. Try using a slightly lower setting if your model allows for heat adjustment. Make sure you are not adding any oil or butter to the popping chamber‚ as these are not intended for use in most hot air popcorn makers and can cause burning. If the popcorn is popping unevenly‚ ensure the popcorn maker is placed on a level surface.

If the mixing paddle isn’t rotating‚ double-check that it is correctly attached and that there are no obstructions. If the issue persists‚ the motor might be faulty‚ and you should contact Cuisinart customer support. If popcorn is overflowing‚ use the correct measuring cup to prevent adding too many kernels. Always allow the unit to cool completely before attempting any repairs or adjustments.

Popcorn Recipes for Cuisinart Makers

Unleash your culinary creativity with these delicious popcorn recipes tailored for your Cuisinart maker! For a classic treat‚ try Cinnamon-Sugar Popcorn. Simply melt unsalted butter‚ then combine granulated sugar‚ ground cinnamon‚ and a pinch of kosher salt. Drizzle over freshly popped popcorn and enjoy. For a savory twist‚ Parmesan Popcorn is a great choice. Drizzle olive oil over your popcorn‚ then sprinkle with grated Parmesan cheese and salt.

If you’re feeling adventurous‚ consider a Caramel Popcorn recipe. Make a caramel sauce with butter‚ brown sugar‚ and a touch of vanilla extract‚ then toss with your popcorn and bake briefly for a crunchy coating. For a spicy kick‚ try Chili Lime Popcorn. Combine chili powder‚ lime zest‚ and a dash of cayenne pepper‚ then sprinkle over your popcorn with a squeeze of fresh lime juice.

Experiment with different herbs and spices to create your own signature popcorn blends. Remember to add flavorings after popping to prevent burning. With your Cuisinart popcorn maker‚ the possibilities are endless!

Warranty and Support Information

Your Cuisinart popcorn maker comes with a limited warranty‚ safeguarding against manufacturing defects in materials and workmanship from the original purchase date. To obtain warranty service‚ contact the Cuisinart Consumer Service Center toll-free. A customer service representative will guide you through the process‚ which may involve returning the appliance for examination‚ repair‚ or adjustment.

Remember to enclose proof of purchase and a check or money order to cover return shipping and handling. The warranty is valid only if the popcorn maker is used according to the provided instructions and for normal household purposes. It does not cover damage caused by misuse‚ accidents‚ alterations‚ or commercial use.

For additional support‚ consult the instruction manual for troubleshooting tips and guidelines. You can also visit the Cuisinart website for FAQs‚ product registration‚ and contact information. Cuisinart is committed to providing excellent customer service and ensuring your satisfaction with their products. Should you encounter any issues or have questions‚ don’t hesitate to reach out for assistance. Their dedicated support team is ready to help you enjoy your Cuisinart popcorn maker for years to come.

guided surgery for dental implants

Guided surgery for dental implants involves precise planning and execution using 3-dimensional images and medical models to ensure accurate implant placement and minimize risks, as seen in contemporary dental practices and research studies online․

Definition and Purpose

Guided surgery for dental implants is a dental procedure that utilizes advanced technology to plan and execute implant placement with high precision․ The definition of guided surgery involves the use of 3-dimensional images and medical models to create a precise guide for implant placement․ The purpose of guided surgery is to ensure accurate implant placement, minimize risks, and reduce the healing time for patients․ This technique allows dentists to transfer implant planning from diagnostic records into clinical reality, resulting in a more predictable outcome․ By using guided surgery, dentists can avoid critical anatomical structures and ensure optimal implant placement, which is essential for the long-term success of dental implants․ The use of guided surgery has become increasingly popular in recent years due to its ability to provide precise and predictable results, making it an essential tool for dentists and oral surgeons․ Overall, the definition and purpose of guided surgery are closely related to its ability to provide accurate and predictable implant placement․

Importance of Guided Surgery

The importance of guided surgery for dental implants lies in its ability to minimize risks and complications associated with traditional implant placement methods․ By using guided surgery, dentists can avoid damaging critical anatomical structures, such as nerves and blood vessels, which can lead to painful and costly complications․ Guided surgery also allows for more accurate implant placement, which is essential for ensuring the long-term success of dental implants․ Additionally, guided surgery can reduce the healing time for patients, allowing them to return to their normal activities more quickly․ The use of guided surgery also enables dentists to provide more predictable results, which can improve patient satisfaction and reduce the need for additional procedures․ Overall, the importance of guided surgery is closely related to its ability to provide a safer, more accurate, and more predictable implant placement experience for patients․ This can lead to better outcomes and improved patient care, making guided surgery an essential tool for dentists and oral surgeons․ Guided surgery is a valuable technique that can benefit both patients and dentists․

Types of Guided Surgery

Guided surgery includes static and dynamic methods, utilizing technology for precise implant placement and improved patient outcomes, enhancing dental implant success rates and overall treatment effectiveness online․

Static Guided Surgery

Static guided surgery is a type of guided surgery that uses a physical guide to direct the drill and implant placement, ensuring accurate and precise positioning․ This method involves creating a surgical guide based on the patient’s 3-dimensional images and medical models․ The guide is then used to guide the drill and implant during surgery, reducing the risk of human error and improving the overall outcome․ Static guided surgery is a popular choice among dentists and surgeons due to its simplicity and effectiveness․ It allows for precise control over the implant placement, which is critical for achieving optimal results․ With static guided surgery, dentists can ensure that the implant is placed in the ideal position, taking into account the patient’s anatomy and the desired outcome․ This approach has been shown to improve the success rate of dental implants and reduce the risk of complications․ Overall, static guided surgery is a reliable and efficient method for achieving accurate and predictable results in dental implant surgery․

Dynamic Guided Surgery

Dynamic guided surgery is a type of guided surgery that utilizes real-time navigation and tracking systems to guide the drill and implant placement․ This method provides a high level of accuracy and flexibility, allowing for adjustments to be made during surgery․ Dynamic guided surgery uses specialized software and hardware to track the movement of the drill and implant in real-time, ensuring that the implant is placed in the optimal position․ This approach is particularly useful in complex cases where the anatomy is challenging or the implant needs to be placed in a specific location․ Dynamic guided surgery also allows for real-time verification of the implant placement, reducing the risk of errors and improving the overall outcome․ With dynamic guided surgery, dentists can achieve high accuracy and precision, even in cases where the anatomy is complex or challenging․ The use of real-time navigation and tracking systems enables dentists to make adjustments during surgery, ensuring that the implant is placed in the ideal position․ This approach has been shown to improve the success rate of dental implants․

Benefits and Results

Guided surgery for dental implants offers improved accuracy and reduced recovery time, resulting in higher patient satisfaction and successful outcomes, with minimal complications and optimal aesthetic results, as reported online․

Implant Survival and Failure Rates

Guided surgery for dental implants has been shown to have a significant impact on implant survival and failure rates․ Studies have reported high implant survival rates, with some studies indicating rates of over 95%․ The use of guided surgery techniques, such as static and dynamic guided surgery, has been shown to reduce the risk of implant failure․ Furthermore, guided surgery allows for more accurate placement of dental implants, which can help to reduce the risk of complications and improve overall outcomes․ The accuracy of guided surgery also enables dentists to better plan and execute implant placement, which can lead to improved implant survival rates․ Additionally, guided surgery can help to reduce the risk of nerve damage and other complications, which can also impact implant survival rates․ Overall, the use of guided surgery for dental implants can help to improve implant survival rates and reduce the risk of failure․ This can lead to better outcomes for patients and improved overall satisfaction with the implant procedure․

Advantages of Guided Surgery

The advantages of guided surgery for dental implants are numerous, with one of the main benefits being increased accuracy and precision․ This is achieved through the use of 3-dimensional images and medical models, which enable dentists to plan and execute implant placement with greater accuracy․ Another advantage of guided surgery is the reduced risk of complications, such as nerve damage and implant misplacement․ Guided surgery also allows for minimally invasive procedures, which can result in less trauma to the patient and faster recovery times․ Additionally, guided surgery can help to improve the overall aesthetic outcome of the implant procedure, as the precise placement of the implant can be planned and executed to achieve the desired result․ The use of guided surgery can also help to reduce the overall treatment time, as the procedure can be planned and executed more efficiently․ Overall, the advantages of guided surgery make it a highly effective and efficient treatment option for dental implants․ This can lead to better outcomes for patients and improved overall satisfaction with the implant procedure, with guided surgery becoming a popular choice among dentists and patients alike․

bullfrog hot tub owners manual

Bullfrog Hot Tub Owners Manual: A Comprehensive Guide

Welcome to the ultimate resource for your Bullfrog Hot Tub! This comprehensive guide will provide you with everything you need to know, from initial setup to long-term maintenance, ensuring years of enjoyment and relaxation. Happy soaking!

Bullfrog Spas are known for their innovative design and customizable JetPak Therapy System. This system allows you to personalize your hot tub experience for targeted hydrotherapy; With a focus on quality and comfort, Bullfrog Spas offers a range of models to fit different lifestyles and preferences. Each spa is designed for energy efficiency and long-lasting performance. Bullfrog Spas is defined by three series and their respective models. Series I: 682, 662, 552, 562, 462, 451, amp; 331 Series II: 362, 251, amp; 231

Understanding Your Bullfrog Spa Model

To properly maintain and troubleshoot your Bullfrog Spa, it’s essential to understand your specific model. This section will guide you through identifying your spa series and locating the model number.

Identifying Your Spa Series (A, R, X, M, STIL)

Bullfrog Spas offers several distinct series, each with unique features and designs. The most common series include A, R, X, M, and STIL. Identifying your spa series is the first step in accessing the correct documentation and support. Each series caters to different needs, whether it’s the size, jet configurations, or aesthetic preferences. The A series offers a range of sizes, while the STIL series focuses on modern design. Knowing your series will help you find the right information.

Locating the Model Number

Finding your Bullfrog Spa’s model number is crucial for accessing specific information related to your hot tub. The model number is typically located on a sticker or plate affixed to the spa’s cabinet. Check around the equipment compartment door, or underneath the spa’s skirt. The label usually contains other important details such as the manufacturing date, voltage, and amperage requirements. Once you have located the model number, you can easily find the correct owner’s manual and other resources online or through Bullfrog Spas’ customer support channels, ensuring proper maintenance.

Safety Instructions and Warnings

Prioritize your safety and well-being by familiarizing yourself with essential safety guidelines. This section outlines critical warnings and precautions to ensure a secure and enjoyable hot tub experience for you and your loved ones.

Electrical Safety Guidelines

Electricity and water can be a dangerous combination. Therefore, strict adherence to electrical safety guidelines is paramount. Always ensure your Bullfrog Spa is connected to a properly grounded GFCI-protected circuit. Never use extension cords or adapters. Regularly inspect the power cord for damage. If any electrical components malfunction, immediately disconnect the power and contact a qualified technician. Remember, your safety is non-negotiable. Familiarize yourself with local electrical codes and regulations before installation. These measures minimize risks and guarantee safe operation.

Water Chemistry and Health Precautions

Maintaining proper water chemistry is crucial for both your health and the longevity of your Bullfrog Spa. Regularly test and balance the water’s pH, alkalinity, and sanitizer levels. Use only approved spa chemicals. Shower before entering the spa to reduce contaminants. Avoid using the spa immediately after strenuous exercise or consuming alcohol. Limit soak times to prevent overheating. Pregnant women, individuals with medical conditions, and those taking medication should consult a physician before using the spa. Keep the spa covered when not in use to prevent debris and maintain water quality.

Initial Setup and Filling Instructions

Proper initial setup is key to a long-lasting, enjoyable spa experience. This section guides you through preparing the site and correctly filling your Bullfrog Hot Tub, ensuring optimal performance from the start.

Preparing the Spa Site

Before filling your Bullfrog Spa, ensure you have a suitable location. A level, structurally sound surface is crucial. Consider a concrete pad, reinforced deck, or properly prepared gravel base. Check local codes for required clearances. The site must support the filled spa’s weight. Avoid areas prone to flooding or excessive sunlight. Accessibility for maintenance is also important. Remember to consult your local building codes regarding safety requirements. A poorly prepared site can lead to significant issues down the road, so invest the time to do it right.

Filling the Spa with Water

With the site prepared, you can now fill your Bullfrog Spa; First, ensure all drain plugs are properly sealed. Use a clean garden hose and place it inside the filter compartment to avoid airlocks. Fill the spa to the recommended water level, typically indicated by a waterline mark. Do not use softened water, as it can be corrosive. Once filled, power on the spa and allow the filtration system to circulate the water. After filling, it’s crucial to balance the water chemistry before use. Consult your dealer for recommended chemicals.

Operating the Control Panel

Your Bullfrog Spa’s control panel is your gateway to customizing your spa experience. Learn to navigate its features to adjust temperature, jets, lighting, and other settings for optimal relaxation and enjoyment.

Understanding Display Symbols

The control panel display on your Bullfrog Spa uses a variety of symbols to communicate important information about the spa’s status and settings. Familiarizing yourself with these symbols is crucial for effective operation and troubleshooting. Common symbols include those for temperature, jet activation, filter cycles, and error messages. Consulting your owner’s manual will provide a detailed explanation of each symbol, ensuring you can easily interpret the information displayed and maintain your spa’s optimal performance. Recognizing these symbols will allow for swift adjustments and problem resolution.

Adjusting Temperature and Jet Settings

Customizing your Bullfrog Spa experience involves mastering temperature and jet adjustments. The control panel allows precise temperature control, ensuring a comfortable soak. Use the up and down arrows to set your desired temperature, consulting the manual for safe limits. Jet settings can also be personalized, varying from gentle to powerful massage. Explore the different jet configurations by pressing the “Jets” button, tailoring the water pressure to your preference. Remember to consult your owner’s manual for specific instructions related to your model’s control panel layout and jet functionalities. Fine-tune your settings for the perfect spa experience.

Regular Maintenance Procedures

Maintaining your Bullfrog Hot Tub is crucial for longevity and hygiene. Consistent water testing, filter cleaning, and timely replacement of components are essential. These practices ensure optimal performance and extend the life of your spa.

Water Testing and Balancing

Maintaining balanced water chemistry is paramount for a safe and enjoyable hot tub experience. Regular water testing is essential to monitor pH, alkalinity, and sanitizer levels. Aim for a pH between 7.2 and 7.8, and appropriate alkalinity according to your Bullfrog Spa’s manual. Use test strips or a liquid test kit to accurately assess water conditions. Adjust chemicals as needed, following product instructions carefully. Balanced water prevents corrosion, scaling, and ensures effective sanitation, contributing to a clean and healthy spa environment.

Filter Cleaning and Replacement

Maintaining clean filters is crucial for optimal water quality and jet performance. Regularly clean your Bullfrog Spa filter, ideally every 1-2 months, by rinsing it thoroughly with a garden hose. For a deeper clean, use a filter cleaning solution to remove oils and debris. Replace the filter annually or as recommended in your owner’s manual, or when you notice signs of damage or reduced water flow. A clean filter ensures efficient filtration, preventing cloudy water and prolonging the lifespan of your spa’s components. Regular attention to filter maintenance will significantly improve your hot tub experience.

Troubleshooting Common Issues

Encountering problems with your Bullfrog Spa? This section provides guidance on diagnosing and resolving common issues. We’ll cover everything from pump malfunctions to heater problems, helping you get back to enjoying your spa quickly.

Pump Problems

Is your Bullfrog Spa’s pump not working correctly? This section will guide you through troubleshooting common pump issues. First, check the power supply and ensure the pump is receiving electricity. Look for error messages on the control panel that may indicate a specific problem. Next, inspect the pump for any visible damage or obstructions. Clean the filter, as a clogged filter can restrict water flow and cause the pump to malfunction. If the pump is making unusual noises, it may indicate a worn-out bearing or other mechanical issue requiring professional attention. Refer to your owner’s manual for specific troubleshooting steps for your model.

Heater Malfunctions

Experiencing issues with your Bullfrog Spa’s heater? Let’s troubleshoot! Begin by verifying the set temperature and ensuring the heater is activated on the control panel. Check the water level, as low water levels can prevent the heater from functioning correctly. Inspect the filter for clogs, as restricted water flow can impact heating performance. Look for error codes on the control panel related to the heater. If you suspect a faulty heating element or thermostat, consult a qualified technician for diagnosis and repair. Remember to always disconnect power before inspecting any electrical components. Regular maintenance can prevent future heater problems.

Winterizing Your Bullfrog Hot Tub

Prepare your Bullfrog hot tub for winter to prevent damage from freezing temperatures. Proper winterization involves draining, cleaning, and protecting the components. Follow these steps to ensure your spa is ready for the cold season.

Draining and Cleaning

Before winterizing your Bullfrog hot tub, begin by draining all the water. Connect a hose to the drain valve, often located near the bottom of the spa, and direct the water away from the spa and your property. Once drained, use a spa cleaner to wipe down the interior surfaces, removing any algae, dirt, or mineral buildup. Rinse thoroughly to ensure no cleaning residue remains. Cleaning prevents stains and odors during the off-season and makes spring startup easier.

Protecting Components from Freezing

After draining and cleaning, focus on protecting the remaining components from freezing temperatures. Use a wet/dry vacuum to remove any standing water from jets, plumbing lines, and equipment. Antifreeze, specifically designed for hot tubs, can be added to the plumbing to prevent freezing and cracking. Insulate the spa equipment compartment with blankets or foam padding. Lastly, cover the hot tub with a secure, waterproof cover to shield it from snow and ice, safeguarding your investment throughout the winter months.

Warranty Information and Support

This section details your Bullfrog Spa warranty, covering what’s protected and for how long. Learn how to register your spa and access customer service for troubleshooting and assistance when needed.

Registering Your Spa

Congratulations on your new Bullfrog Spa! Registering your spa is a crucial step to ensure your warranty is valid and that you receive important updates and information regarding your product. The registration process is simple and can typically be completed online through the Bullfrog Spas website. You will need your spa’s model number, serial number, and purchase date. Completing this registration will also allow Bullfrog Spas to contact you directly with any safety notifications or product recalls, giving you peace of mind and ensuring the longevity of your spa enjoyment. Don’t delay, register today!

Contacting Customer Service

Should you encounter any issues with your Bullfrog Spa or have questions regarding its operation or maintenance, Bullfrog Spas provides excellent customer service support. Their website offers a comprehensive FAQ section and troubleshooting guides. If you require further assistance, you can contact them via phone or email. Before contacting customer service, it’s helpful to have your spa’s model number and serial number readily available. Be prepared to describe the issue you are experiencing in detail. The Bullfrog Spas website also includes a wealth of resources. This ensures a more efficient and effective resolution to your query.

singer one manual

The Singer One manual provides guidance on operation and maintenance, with

    step-by-step instructions

and troubleshooting tips, helping users get the most out of their sewing machine experience always successfully.

Overview of the Singer One Sewing Machine

The Singer One sewing machine is a versatile and user-friendly device, designed to meet the needs of sewers at various skill levels. With its range of features and capabilities, this machine is suitable for a wide range of sewing tasks, from basic repairs to complex projects. The Singer One sewing machine is equipped with a variety of stitch options, including straight stitch, zigzag stitch, and decorative stitches, allowing users to create a wide range of fabrics and textures. Additionally, the machine features a free arm, making it easy to sew cuffs, sleeves, and other hard-to-reach areas. The Singer One sewing machine is also designed with safety in mind, featuring a automatic shut-off and a secure threading system. Overall, the Singer One sewing machine is a reliable and efficient tool for anyone looking to create high-quality sewing projects. The machine is easy to use and maintain.

Importance of the Instruction Manual

The instruction manual is a crucial component of the Singer One sewing machine, providing users with the necessary guidance to operate and maintain the device. The manual contains detailed information on the machine’s features, functions, and troubleshooting tips, helping users to avoid common mistakes and ensure optimal performance. By following the instructions outlined in the manual, users can unlock the full potential of their Singer One sewing machine, exploring its various capabilities and creating high-quality sewing projects. The manual also serves as a reference guide, allowing users to quickly and easily access information on specific topics, such as threading, stitching, and maintenance. Overall, the instruction manual is an essential resource for anyone looking to get the most out of their Singer One sewing machine, and is a valuable companion for sewers of all skill levels, from beginner to advanced. The manual is very helpful.

Types of Singer One Manuals

Various Singer One manuals are available, including instruction and service manuals, in different formats, such as digital and physical copies, with detailed information always.

Singer One Plus Sewing Machine Instruction Manual

The Singer One Plus Sewing Machine Instruction Manual is a comprehensive guide, with 72 pages of detailed information, including setup and operation instructions, troubleshooting tips, and maintenance advice, to help users master their sewing machine. This manual is designed to provide clear and concise instructions, making it easy for users to understand and utilize the full potential of their Singer One Plus sewing machine. The manual covers various topics, such as threading, tensioning, and stitching, as well as advanced features and techniques, allowing users to improve their sewing skills and achieve professional-looking results. With this manual, users can confidently operate their Singer One Plus sewing machine, and create a wide range of sewing projects, from simple to complex, with ease and precision, using the included diagrams and illustrations for reference. The manual is available in digital and physical formats.

Singer One Sewing Machine Instruction Manual

The Singer One Sewing Machine Instruction Manual is a detailed guide, containing 60 pages of information, designed to help users understand and operate their Singer One sewing machine. This manual provides step-by-step instructions, covering topics such as setting up the machine, threading, and basic stitching techniques. The manual also includes troubleshooting tips and maintenance advice, to help users resolve common issues and keep their machine in good working condition. With this manual, users can learn to use their Singer One sewing machine with confidence, and create a variety of sewing projects, from simple repairs to complex garments. The manual is written in a clear and concise manner, making it easy for users to follow along and master the techniques and features of their Singer One sewing machine, using the included diagrams and illustrations for reference and guidance. The manual is available in digital and physical formats.

Service Manual for Singer One Plus

The Singer One Plus service manual provides technical information and

    troubleshooting guides

for repair and maintenance purposes always online successfully.

Service Manual Index

The Singer One Plus service manual index includes various sections such as disassembling of covers, test mode, and adjustment of feed dog height, providing a comprehensive guide for technicians.
The index also covers topics like needle bar height, needle threader height, and presser foot height and direction, making it easier to navigate and find specific information.
With a detailed table of contents, users can quickly locate the section they need, saving time and effort.
The service manual index is a valuable resource for anyone looking to repair or maintain their Singer One Plus sewing machine, and it is available for download online.
The index is organized in a logical and easy-to-follow manner, making it accessible to users with varying levels of technical expertise.
Overall, the Singer One Plus service manual index is a useful tool for anyone working with this sewing machine.

Downloading the Service Manual

The Singer One Plus service manual can be downloaded online in a pdf format, allowing users to access the information they need quickly and easily.
The download process is straightforward, and the manual is available from various online sources, including the official Singer website.
To download the service manual, users simply need to click on the download link and save the file to their computer or mobile device.
The manual can then be viewed using a pdf reader, and users can print out the pages they need or save them for future reference.
The service manual is a valuable resource for anyone looking to repair or maintain their Singer One Plus sewing machine, and downloading it online is a convenient and efficient way to access the information;
The download is free, and the manual is available at all times, making it a reliable source of information for users.

Classification of Singer One

The Singer One is classified as a beginner sewing machine with basic features and functions for easy use always successfully online.

Beginner Classification

The Singer One is categorized as a beginner sewing machine, suitable for individuals with limited sewing experience. This classification is based on the machine’s features and functions, which are designed to be easy to use and understand. The beginner classification indicates that the Singer One is ideal for those who are new to sewing and want to learn the basics. The machine’s simplicity and user-friendly interface make it an excellent choice for beginners. With the Singer One, beginners can learn various sewing techniques and develop their skills without feeling overwhelmed by complex features. The machine’s manual provides clear instructions and guidance, making it easy for beginners to get started with their sewing projects. Overall, the Singer One is a great option for those who are just starting out with sewing and want a reliable and easy-to-use machine.

Features for Beginners

The Singer One manual outlines various features that make the machine suitable for beginners, including adjustable stitch length and width, and a free arm for sewing cuffs and sleeves. The machine also has a built-in needle threader, which simplifies the threading process. Additionally, the Singer One has a variety of stitch options, including straight stitch, zigzag stitch, and decorative stitches. These features allow beginners to experiment with different techniques and projects, such as sewing garments, home decor items, and crafts. The machine’s automatic tension and adjustable presser foot pressure also make it easy for beginners to achieve consistent results. With these features, beginners can develop their sewing skills and confidence, and move on to more complex projects as they become more comfortable with the machine. The Singer One’s features are designed to be intuitive and easy to use.

The Singer One manual is a valuable resource, providing users with a comprehensive guide to operating and maintaining their sewing machine successfully every time always with great ease online.

Final Thoughts on the Singer One Manual

The Singer One manual is a detailed guide that provides users with a comprehensive understanding of their sewing machine, helping them to unlock its full potential and achieve professional results. With its clear and concise instructions, users can easily navigate the various features and functions of their machine, from setting up to mastering complex sewing techniques. The manual is available in various formats, including digital and physical copies, making it easily accessible to users. By following the guidelines outlined in the manual, users can ensure that their sewing machine is properly maintained and operated, extending its lifespan and optimizing its performance. Overall, the Singer One manual is an essential resource for anyone looking to get the most out of their sewing machine, and its importance cannot be overstated. The manual is a valuable companion for any sewer.