window tint guide
Window tinting transforms vehicle interiors by reducing glare, enhancing privacy, and improving energy efficiency. It involves applying a specialized film that filters heat and UV rays while maintaining visibility. Choosing the right tint balances comfort, safety, and legal compliance. Find the best tint for you now
What is Window Tint Film and How It Works
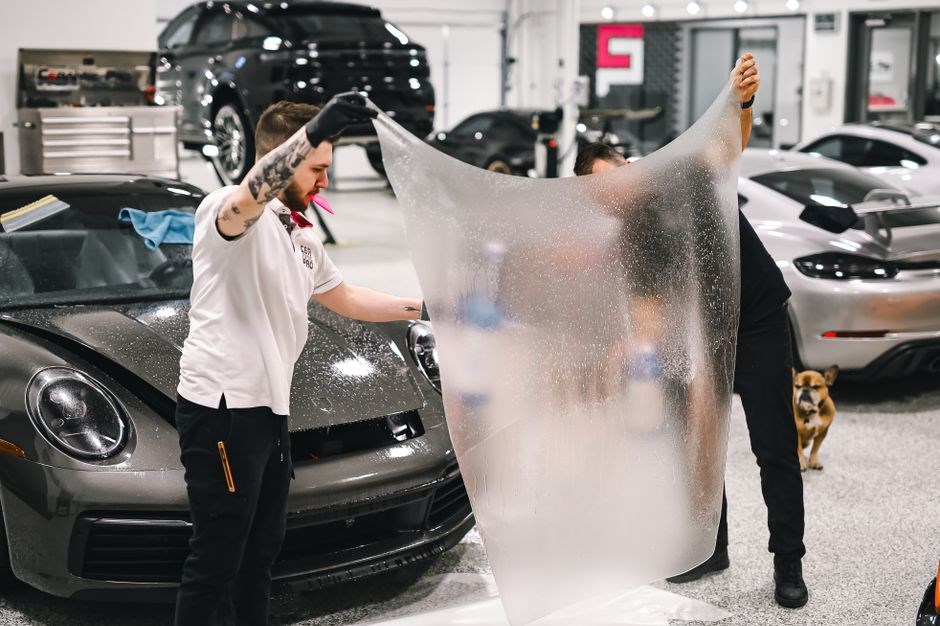
Window tint film is a thin, multi‑layer polymer sheet that adheres to glass surfaces. The outer layer is a durable, heat‑resistant film; the middle layer contains pigments or metal particles; the inner layer is a protective backing that bonds to the glass. When applied, the film’s micro‑structured surface reflects and refracts incoming light, reducing the amount of visible light and heat that penetrates the interior. The pigment or metalized layer absorbs infrared radiation, converting it to a negligible amount of heat that is dissipated by the film’s surface. The result is a cooler cabin, less glare on the dashboard, and a lower load on the air‑conditioning system. In addition, the film’s UV‑blocking properties filter out up to 99 % of harmful ultraviolet rays, protecting occupants’ skin and interior upholstery. The film’s adhesive layer is engineered to bond strongly to the glass, preventing peeling or bubbling over time. The thickness of the film is measured in mils (thousandths of an inch); typical automotive tints range from 0.5 mils to 2.0 mils, providing varying degrees of light transmission. The film’s visible light transmission (VLT) rating determines how much light passes through, which is regulated by state laws; By selecting a film with the appropriate VLT, owners can achieve both comfort and legal compliance. Modern tints also incorporate anti‑glare coatings that scatter reflected light, improving visibility during night driving. The combination of reflective, absorptive, and protective layers makes window tint film an effective, low‑maintenance solution for enhancing vehicle performance and occupant well‑being.
Its installation is straightforward, yet precision is key to avoid bubbles and ensure a flawless finish today.
Key Benefits: Comfort, Privacy, Energy Efficiency, Safety
Window tint film offers a quartet of advantages that elevate every driving experience. First, comfort: by reflecting a significant portion of solar radiation, the film keeps the cabin cooler, reducing reliance on air‑conditioning and cutting fuel consumption. Second, privacy: the tinted surface limits rear‑view visibility, protecting occupants from prying eyes while maintaining safe visibility for the driver. Third, energy efficiency: the film’s UV‑blocking layer cuts glare and heat, lowering interior temperatures and extending the life of seats, dashboards, and electronic components. Fourth, safety: in the event of a collision, the film holds glass fragments together, reducing the risk of injury from shattered glass. Additionally, the film’s anti‑glare coating improves nighttime visibility, and its UV protection safeguards skin and interior materials from fading. Together, these benefits translate into lower operating costs, increased comfort, and enhanced occupant protection, making tinting a smart investment for both personal and commercial vehicles. Moreover, the film’s durability ensures it resists scratches, fading, and bubbling for years, even in harsh climates. Finally, the installation process is straightforward, allowing owners to upgrade their vehicles without professional help, provided they follow safety guidelines and use proper tools. In addition, many tint films include a low‑emissivity coating that further reduces heat transfer, keeping the cabin comfortable while also preserving interior trim and electronics from UV‑induced degradation now!!.
Choosing the Right Tint for Your Vehicle or Home
Selecting the ideal tint involves evaluating your climate, usage, and legal limits. Consider UV protection, heat rejection, and privacy levels. Match the film type—metalized, carbon, or dyed—to your aesthetic goals while ensuring compliance with VLT regulations.
Types of Tint Film: Metalized, Carbon, Dyed, Hybrid
Metalized films are coated with a thin layer of metal, typically aluminum or silver, that reflects heat and infrared radiation. This reflective surface creates a noticeable sheen and can reduce glare, but it may interfere with electronic signals and can be more visible from outside. Carbon films use a black carbon layer to absorb heat, offering a matte appearance that resists fingerprints and is less likely to affect radio reception. They provide excellent UV protection and a subtle darkening effect without the metallic glare. Dyed films rely on pigments to tint the glass, producing a uniform color that blends seamlessly with the vehicle’s interior. While they lack the heat‑rejection properties of metalized or carbon options, dyed tints are often more affordable and easier to install. Hybrid films combine two or more of these technologies—such as a carbon layer beneath a dyed coating—to deliver a balance of heat control, privacy, and signal compatibility. When choosing a film, consider the desired aesthetic, functional performance, and any potential interference with navigation or communication devices. Each type offers distinct advantages, and the best choice depends on your specific needs and priorities. Metalized tints are ideal for extreme heat environments and for drivers who want maximum glare reduction, but they can be more expensive and may create a reflective look that some find undesirable. Carbon tints are favored by those who want a discreet, matte finish that still blocks a significant amount of heat and UV rays. Dyed tints are popular for their low cost and ease of application, making them a good option for budget‑conscious consumers who still want a darker look. Hybrid tints provide a compromise, offering the heat‑rejection of carbon with the aesthetic of dyed, and can be tailored to meet specific legal VLT requirements while maintaining signal integrity. Understanding these differences helps you select the film that best aligns with your comfort, safety, and style goals.
Thickness and durability vary among manufacturers, with some films offering multi‑layer construction that enhances scratch resistance and longevity. Higher‑grade metalized films may come with protective coatings that reduce the risk of peeling or bubbling over time. Carbon and hybrid films often include a protective layer that resists abrasion and maintains clarity for years. Maintenance is generally straightforward: a mild soap solution and a microfiber cloth will keep the tint looking fresh without damaging the film. However, some metalized films may require special cleaning agents to avoid tarnishing the reflective surface. When evaluating cost, remember that higher performance films typically carry a premium price, but the long‑term savings from reduced air‑conditioning usage and lower UV damage can offset the initial investment. Ultimately, the decision hinges on balancing your budget, desired level of heat rejection, privacy needs, and aesthetic preference.
Visible Light Transmission (VLT) and Legal Regulations
Visible Light Transmission, or VLT, is the percentage of light that passes through a window tint film. Regulators use VLT to set legal limits for different windows, ensuring drivers maintain adequate visibility while enjoying the benefits of tint. For most states, the front side windows must allow at least 35–70% VLT, with variations for the rear side windows and side windows. Some jurisdictions allow darker tints on rear windows, often permitting as low as 10–20% VLT, whereas front side windows are typically capped at 35–45%. The exact thresholds differ by region, so checking local statutes before purchasing is essential. In addition to VLT, many laws address heat‑rejection capabilities, UV protection, and reflective properties. For example, certain states prohibit highly reflective or mirrored films on front windows, citing safety concerns. Some municipalities also enforce “no‑glare” rules, limiting the amount of light that can be reflected toward oncoming traffic. Enforcement is usually carried out by law‑enforcement officers who inspect vehicles during routine stops or at dedicated tint‑inspection events. Penalties range from fines to mandatory removal of non‑compliant tint, and in extreme cases, vehicle impoundment. To avoid legal trouble, consumers should verify the VLT rating on the film’s label and compare it with their state’s requirements. Many manufacturers provide VLT charts and compliance certificates, while professional installers can confirm the correct shade during installation. Staying informed about changes in legislation—especially in states that frequently update their tint laws—helps drivers maintain both comfort and compliance. Ultimately, understanding VLT and local regulations ensures that your tint choice enhances your vehicle without risking legal penalties. Check laws
Shade Selection: Balancing Comfort, Privacy, and Compliance
Choosing the right shade is a nuanced decision that hinges on three pillars: interior comfort, privacy demands, and legal boundaries. Comfort is largely dictated by heat rejection and glare control; darker tints lower VLT, trapping less solar radiation and keeping cabin temperatures down. However, a shade that is too dark can compromise visibility, especially at night or in low‑light conditions, potentially increasing accident risk. Privacy is achieved by reducing the amount of light that can be seen through the glass, which is often a primary motivation for owners who value discretion. Yet, privacy must be weighed against the need for clear sightlines for drivers and passengers. Legal compliance ties the two together: most jurisdictions specify a minimum VLT for front side windows, a maximum for rear side windows, and often distinct limits for side windows. In many states, a 35% VLT on the front side is the baseline, while rear windows may allow as low as 10% VLT. Some regions also impose reflective or mirrored film restrictions, limiting how much light can bounce back toward oncoming traffic. The optimal shade, therefore, is one that satisfies the VLT requirements for each window while delivering the desired heat rejection and privacy level. A balanced approach often involves selecting a mid‑range VLT (e.g., 35–45%) for front windows, ensuring compliance and safety, and opting for a darker VLT (10–20%) on rear windows to maximize privacy and heat control. Always verify the shade’s VLT rating against local statutes before purchase, and consider consulting a certified installer to confirm that the chosen film meets both comfort and legal criteria. Balance your choice for safety, style, and compliance.
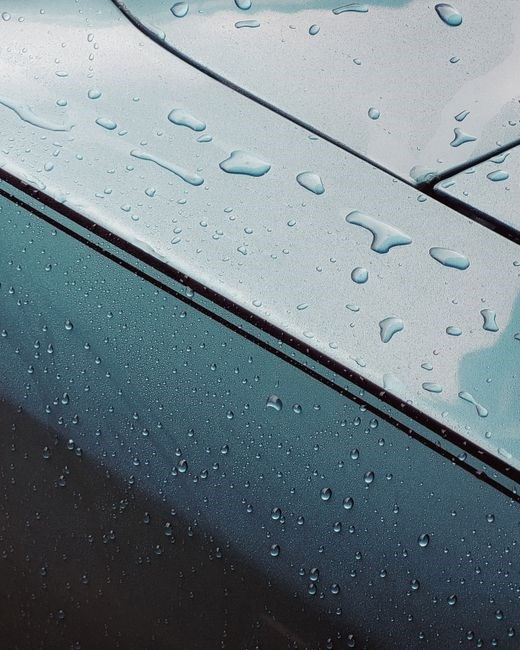
Window tint films are engineered to reflect and absorb solar radiation, reducing the heat that penetrates a vehicle’s interior. Blocking up to 70–90% of IR energy, high‑performance tints lower cabin temperatures, reducing air‑conditioning load and improving fuel economy. Heat reduction lessens glare, enhancing visibility and comfort during drives. In addition to thermal benefits, most modern tints provide substantial ultraviolet (UV) protection, blocking 99% of harmful 280–400 nm wavelengths. This shields occupants from skin damage, reduces the risk of cataracts, and preserves interior upholstery, headliners, and electronic components from UV‑induced fading and cracking. Energy‑efficient tints are available in metalized, carbon, and hybrid constructions; metalized films reflect IR but can interfere with radio signals, while carbon films offer a more balanced IR/UV rejection with minimal signal disruption. Hybrid films combine the best of both worlds, delivering high IR rejection, excellent UV filtration, and superior signal compatibility. For residential applications, tints with a VLT of 30–50% are common, striking a balance between natural light and heat control. Commercial and fleet vehicles often opt for lower VLTs to maximize energy savings while staying within legal limits. When selecting a tint, consider the local climate: hotter regions benefit from higher IR rejection, whereas cooler areas prioritize UV protection. Installation guarantees performance; will apply tint at angle, sealing seams to prevent moisture ingress and maintain thermal efficiency. Ultimately, energy‑efficient tints provide measurable savings on HVAC usage, extend the lifespan of interior materials, and protect occupants from UV exposure, making them a smart investment for both personal and commercial vehicles.
DIY vs Professional Installation Decision Factors
Choosing between a DIY approach and hiring a professional for window tinting hinges on several critical factors. Cost is the most immediate consideration; a DIY kit can cost between $30 and $150, while a professional installation typically ranges from $200 to $500 depending on vehicle size and tint type. However, price alone does not capture the full picture. Skill level is paramount—tinting requires precise cutting, alignment, and pressure control to avoid bubbles, peeling, or uneven edges. A novice may inadvertently leave air pockets that compromise both aesthetics and UV protection. Time investment also varies; a seasoned installer can complete a full vehicle in 2–4 hours, whereas an inexperienced DIYer might spend 8–12 hours, including learning curves and potential rework. Warranty and quality assurance differ as well. Professional installers often provide a 5–10 year warranty covering adhesion, color shift, and removal, whereas DIY kits typically offer no such guarantee. Additionally, professionals have access to high‑grade tools—squeegees, heat guns, and specialized cutting equipment—that are difficult to acquire or operate at home. Legal compliance is another factor: certain tint percentages are regulated by state or local laws, and professionals are familiar with these regulations, ensuring the installed tint meets legal VLT requirements. Finally, resale value can be affected; a professionally installed tint often adds to a vehicle’s appeal, whereas a poorly applied DIY tint may detract from marketability. In summary, the decision should weigh upfront cost against long‑term benefits such as durability, warranty, legal compliance, and overall quality.
Moreover, environmental factors such as humidity and temperature affect adhesive curing. Professionals control these variables in a climate‑regulated shop, while DIY installers risk bubbles or uneven adhesion. For many, the peace of mind from expert service outweighs the allure of a DIY project the assurance of compliance with all local regulations. For a free experience. Ultimately, the choice depends on your priorities and confidence level. !!!
Essential Tools and Materials for DIY Tinting
Before you begin a DIY tint job, gather the right tools and materials to ensure a smooth, bubble‑free finish. The core kit includes a high‑quality window tint film—choose a type that matches your desired VLT and durability. A 3‑inch wide cutting blade or razor for trimming edges, a precision blade for clean cuts, and a sharp utility knife for trimming around mirrors and vents. A squeegee with a rubber edge is essential for removing air pockets; a 12‑inch squeegee works well for most windows. A heat gun or hair dryer set to low heat helps relax the film and smooth stubborn wrinkles. A spray bottle filled with a mild soap‑water solution (or a dedicated glass cleaner) keeps the glass free of dust and fingerprints during application. A microfiber cloth or lint‑free towel is needed for wiping and drying. For larger windows or multiple panels, a long‑handle squeegee or a “squeegee‑squeegee” can help maintain even pressure. A small brush or a silicone brush can be used to push out bubbles from corners. A spray bottle of a 1:1 vinegar‑water mix can help remove adhesive residue after removal. Finally, a set of masking tape or painter’s tape helps keep the film in place during trimming. Always work in a dust‑free environment: a clean, flat workbench or a dedicated tinting table prevents debris from sticking to the film. Use a ruler or a straightedge to mark cut lines accurately. A cutting mat protects surfaces and provides a stable cutting surface. Protective gloves keep your hands clean and prevent oils from transferring to the film. Safety glasses shield your eyes from stray blades. If you plan to tint large glass panels, consider a light source or a lamp to illuminate the window, ensuring you see every detail. For a professional finish, a small brush or a silicone brush can be used to push out bubbles from corners and edges. After the film is applied, a spray bottle of a 1:1 vinegar‑water solution can help remove any adhesive residue when you later decide to remove the tint. By assembling these tools and materials before starting, you reduce the risk of mistakes and increase the likelihood of a flawless, long‑lasting tint job.
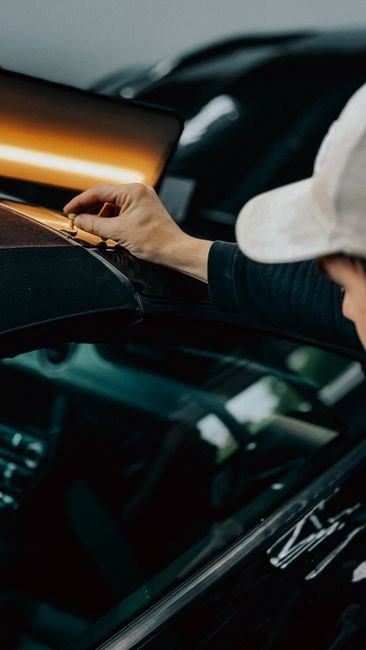
Step-by-Step Installation Technique Overview
Prepare the window: clean with glass cleaner, remove all dust, and dry with a microfiber cloth. 2. Measure and cut the tint film: use a ruler to mark the window dimensions, add a 1‑inch safety margin, and cut with a utility knife. 3. Wet the glass: spray a generous amount of soapy water (1:1 vinegar‑water) to keep the film from sticking prematurely. 4. Position the film: place the wet side of the film on the glass, aligning the top edge. 5. Remove air bubbles: use a squeegee to push bubbles toward the edges, applying gentle pressure. 6. Trim excess film: carefully cut the film around mirrors, vents, and seams with a razor blade. 7. Dry and cure: let the film sit for 24 hours in a dust‑free area; avoid direct sunlight. 8. Inspect: check for any remaining bubbles or misalignments and re‑squeegee if necessary. 9. Final clean: wipe the film with a microfiber cloth to remove fingerprints. 10. Maintain: apply a silicone cleaner monthly to keep the tint clear and extend its lifespan.
After installation, keep the tint in a cool, shaded area for 48 hours to allow adhesive to set fully. Avoid using harsh chemicals; instead, use a soft cloth with a mild glass cleaner. Periodically inspect for peeling edges, and if any occur, reapply a small strip of film. For long-term durability, consider a protective coating that resists UV degradation.
Keep the tint away from extreme heat and direct sunlight for the first 48 hours. Store the vehicle in shade, and avoid abrasive cleaners that could damage the film’s surface carefully.
Proper aftercare preserves tint longevity. Clean with a soft microfiber cloth and a 50/50 vinegar‑water solution, avoiding ammonia or acetone. Spray lightly, wipe in a single direction, and let dry. For stubborn stains, use a silicone‑based cleaner. Never use a razor blade or abrasive pad; they scratch the film.
Routine maintenance: wipe the tint once a month to remove dust. If the film develops bubbles, gently lift the edge with a fingernail and re‑squeegee. For peeling corners, apply a small amount of adhesive and press firmly. If the tint fades, replace the film; UV exposure degrades the polymer layer.
Common issues: air bubbles, peeling, and discoloration. Bubbles usually result from trapped air during installation; re‑squeegee or use a heat gun at low setting to release. Peeling occurs when the adhesive loses tack; apply a thin layer of window‑film adhesive and press. Discoloration may indicate a low‑quality film; upgrade to a premium product.
When cleaning, avoid high‑pressure washers; they can lift the film. Store the vehicle in shade to prevent heat‑induced blistering. If you notice a crack, replace the tint immediately to avoid further damage. Always follow the manufacturer’s guidelines for cleaning agents and temperature limits.
Use a microfiber cloth dampened with glass cleaner; avoid spraying directly onto the film to prevent streaks; Streak‑free look.
If the film starts to peel at the edges, apply a bead of adhesive and press firmly.
If the tint fades, consider re‑tinting to restore protection.
Apply a silicone conditioner yearly for long‑term protection.
Removal and Replacement Process
Removal tint requires steps for protection. Start by heating the tint with a heat gun or hair dryer set to low heat; this softens the adhesive. Hold a plastic scraper or a razor blade at a 45-degree angle and gently lift a corner. Work slowly, applying heat as needed, until the film detaches. If the tint sticks, apply a small amount of adhesive remover or rubbing alcohol to the edge and re‑heat. Once removed, clean the glass with a glass cleaner and a microfiber cloth to remove residue. Use a silicone-based adhesive remover if stubborn glue remains. After cleaning, inspect the glass for scratches or damage; if any, polish or replace the glass before re‑tinting. For replacement, measure the window dimensions accurately. Cut the new tint to size, leaving a small margin. Apply a thin layer of adhesive to the glass, then lay the tint film, smoothing from the center outward with a squeegee. Trim excess film with a sharp blade. Finally, seal the edges with a clear silicone sealant to prevent moisture ingress. Allow the new tint to cure for at least 24 hours before driving or exposing to sunlight. When removing old tint, be mindful of the vehicle’s paint; avoid excessive heat that can scorch the surface. A heat gun set to 200°F is usually sufficient. If the film is stubborn, apply a commercial adhesive remover spray, let it sit for 5 minutes, then reheat. For replacement, choose a film that matches the original VLT rating to maintain legal compliance. Use a high‑quality squeegee to eliminate air bubbles. Keep tint clean for clarity and longevity. every!!!!!!!!!